


How to Boot Kali Linux on Any Laptop or Desktop: Step-by-Step Guide 💯
How to boot kali Linux on a laptop or desktop using UEFI?


Table of contents
hii, in this blog I will teach you how to boot Kali Linux on a laptop or desktop.
To boot Kali Linux on a laptop or desktop computer, you will need to create a bootable USB drive with the Kali Linux image file. I will use Balena Etcher to flash.
To flash Kali Linux using Balena Etcher, follow these steps:
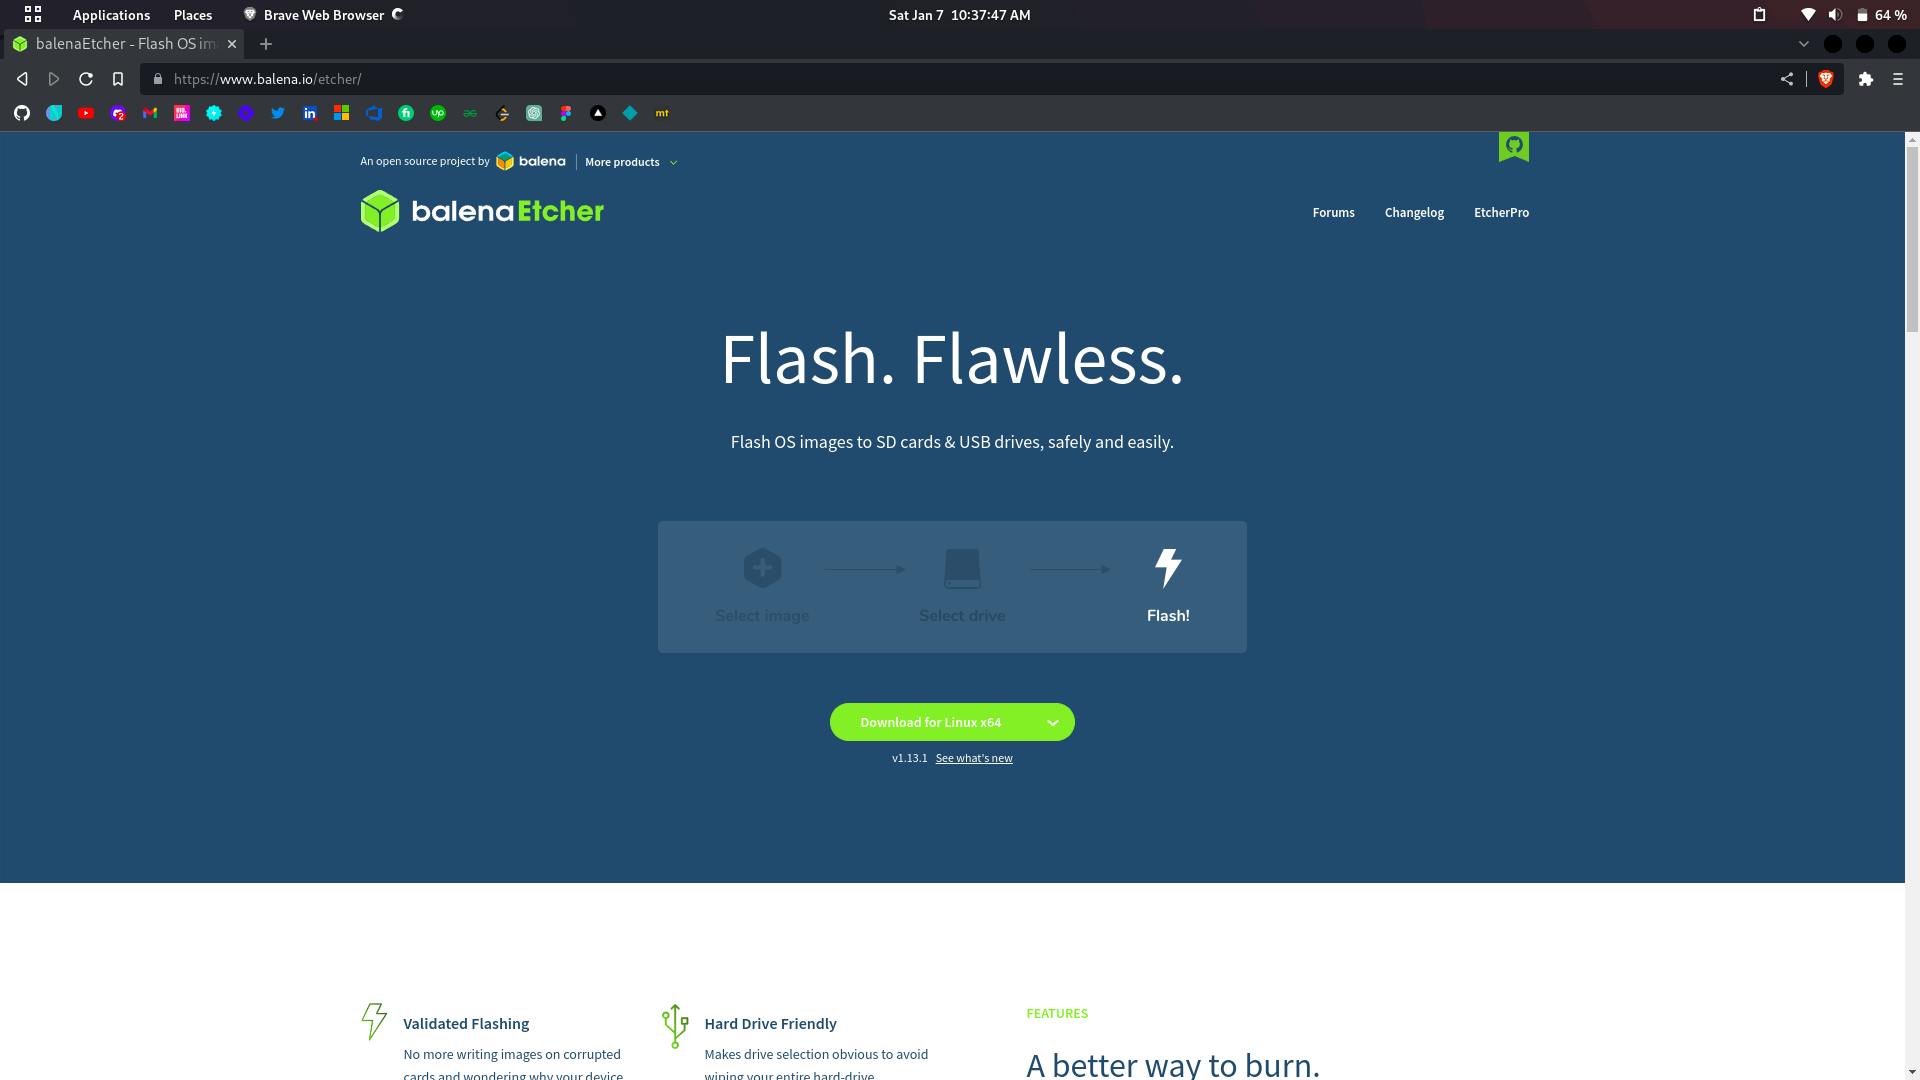
- Download and install the Balena Etcher software from the official website: balena.io/etcher
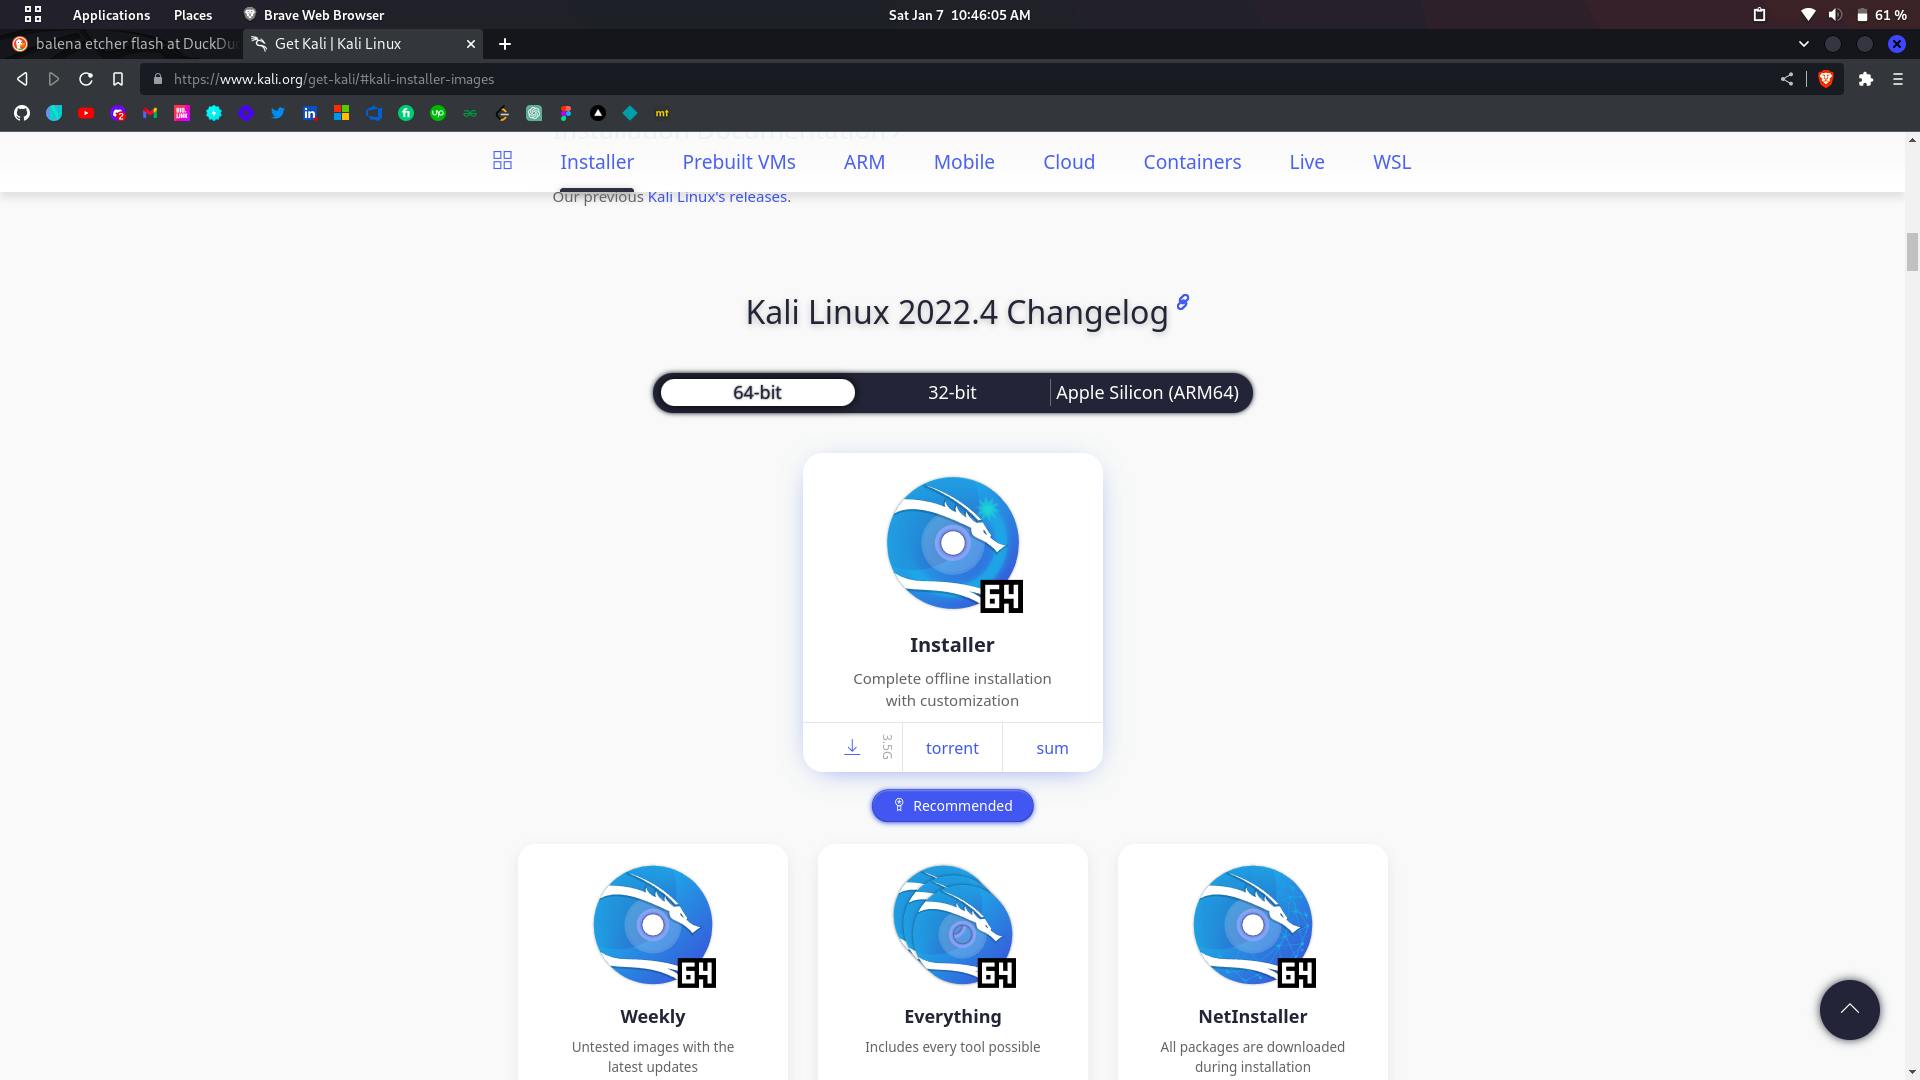
- Download the Kali Linux image file from the official website: kali.org/downloads
Connect your USB drive to your computer. Make sure it is large enough [Max- 16GB] to hold the Kali Linux image file.
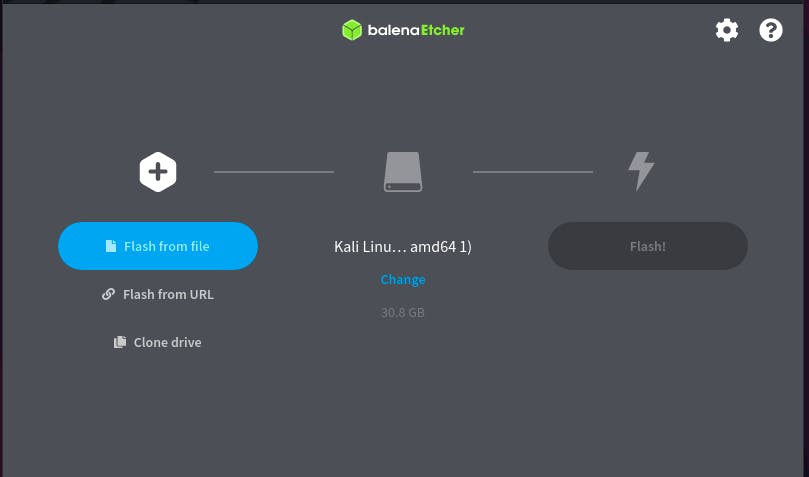
Open Balena Etcher and select the Kali Linux image file that you downloaded.
Select the USB drive that you want to use to flash the image.
Click "Flash!" to begin the flashing process. This may take a few minutes to complete. Once the flashing process is complete, you can safely remove the USB drive and use it to boot Kali Linux on any compatible device.
Note: Make sure to back up any critical data on the USB drive, as the flashing process will erase all data on the drive.
Once you have created the bootable USB drive, you can boot Kali Linux by following these steps:
Insert the bootable USB drive into a USB port on your laptop or desktop computer.
Restart the computer and enter the BIOS or UEFI settings. The exact process for doing this will vary depending on your computer's make and model, but it usually involves pressing a specific key (such as HP F9) during the boot process.[I'm Using HP Desktop]
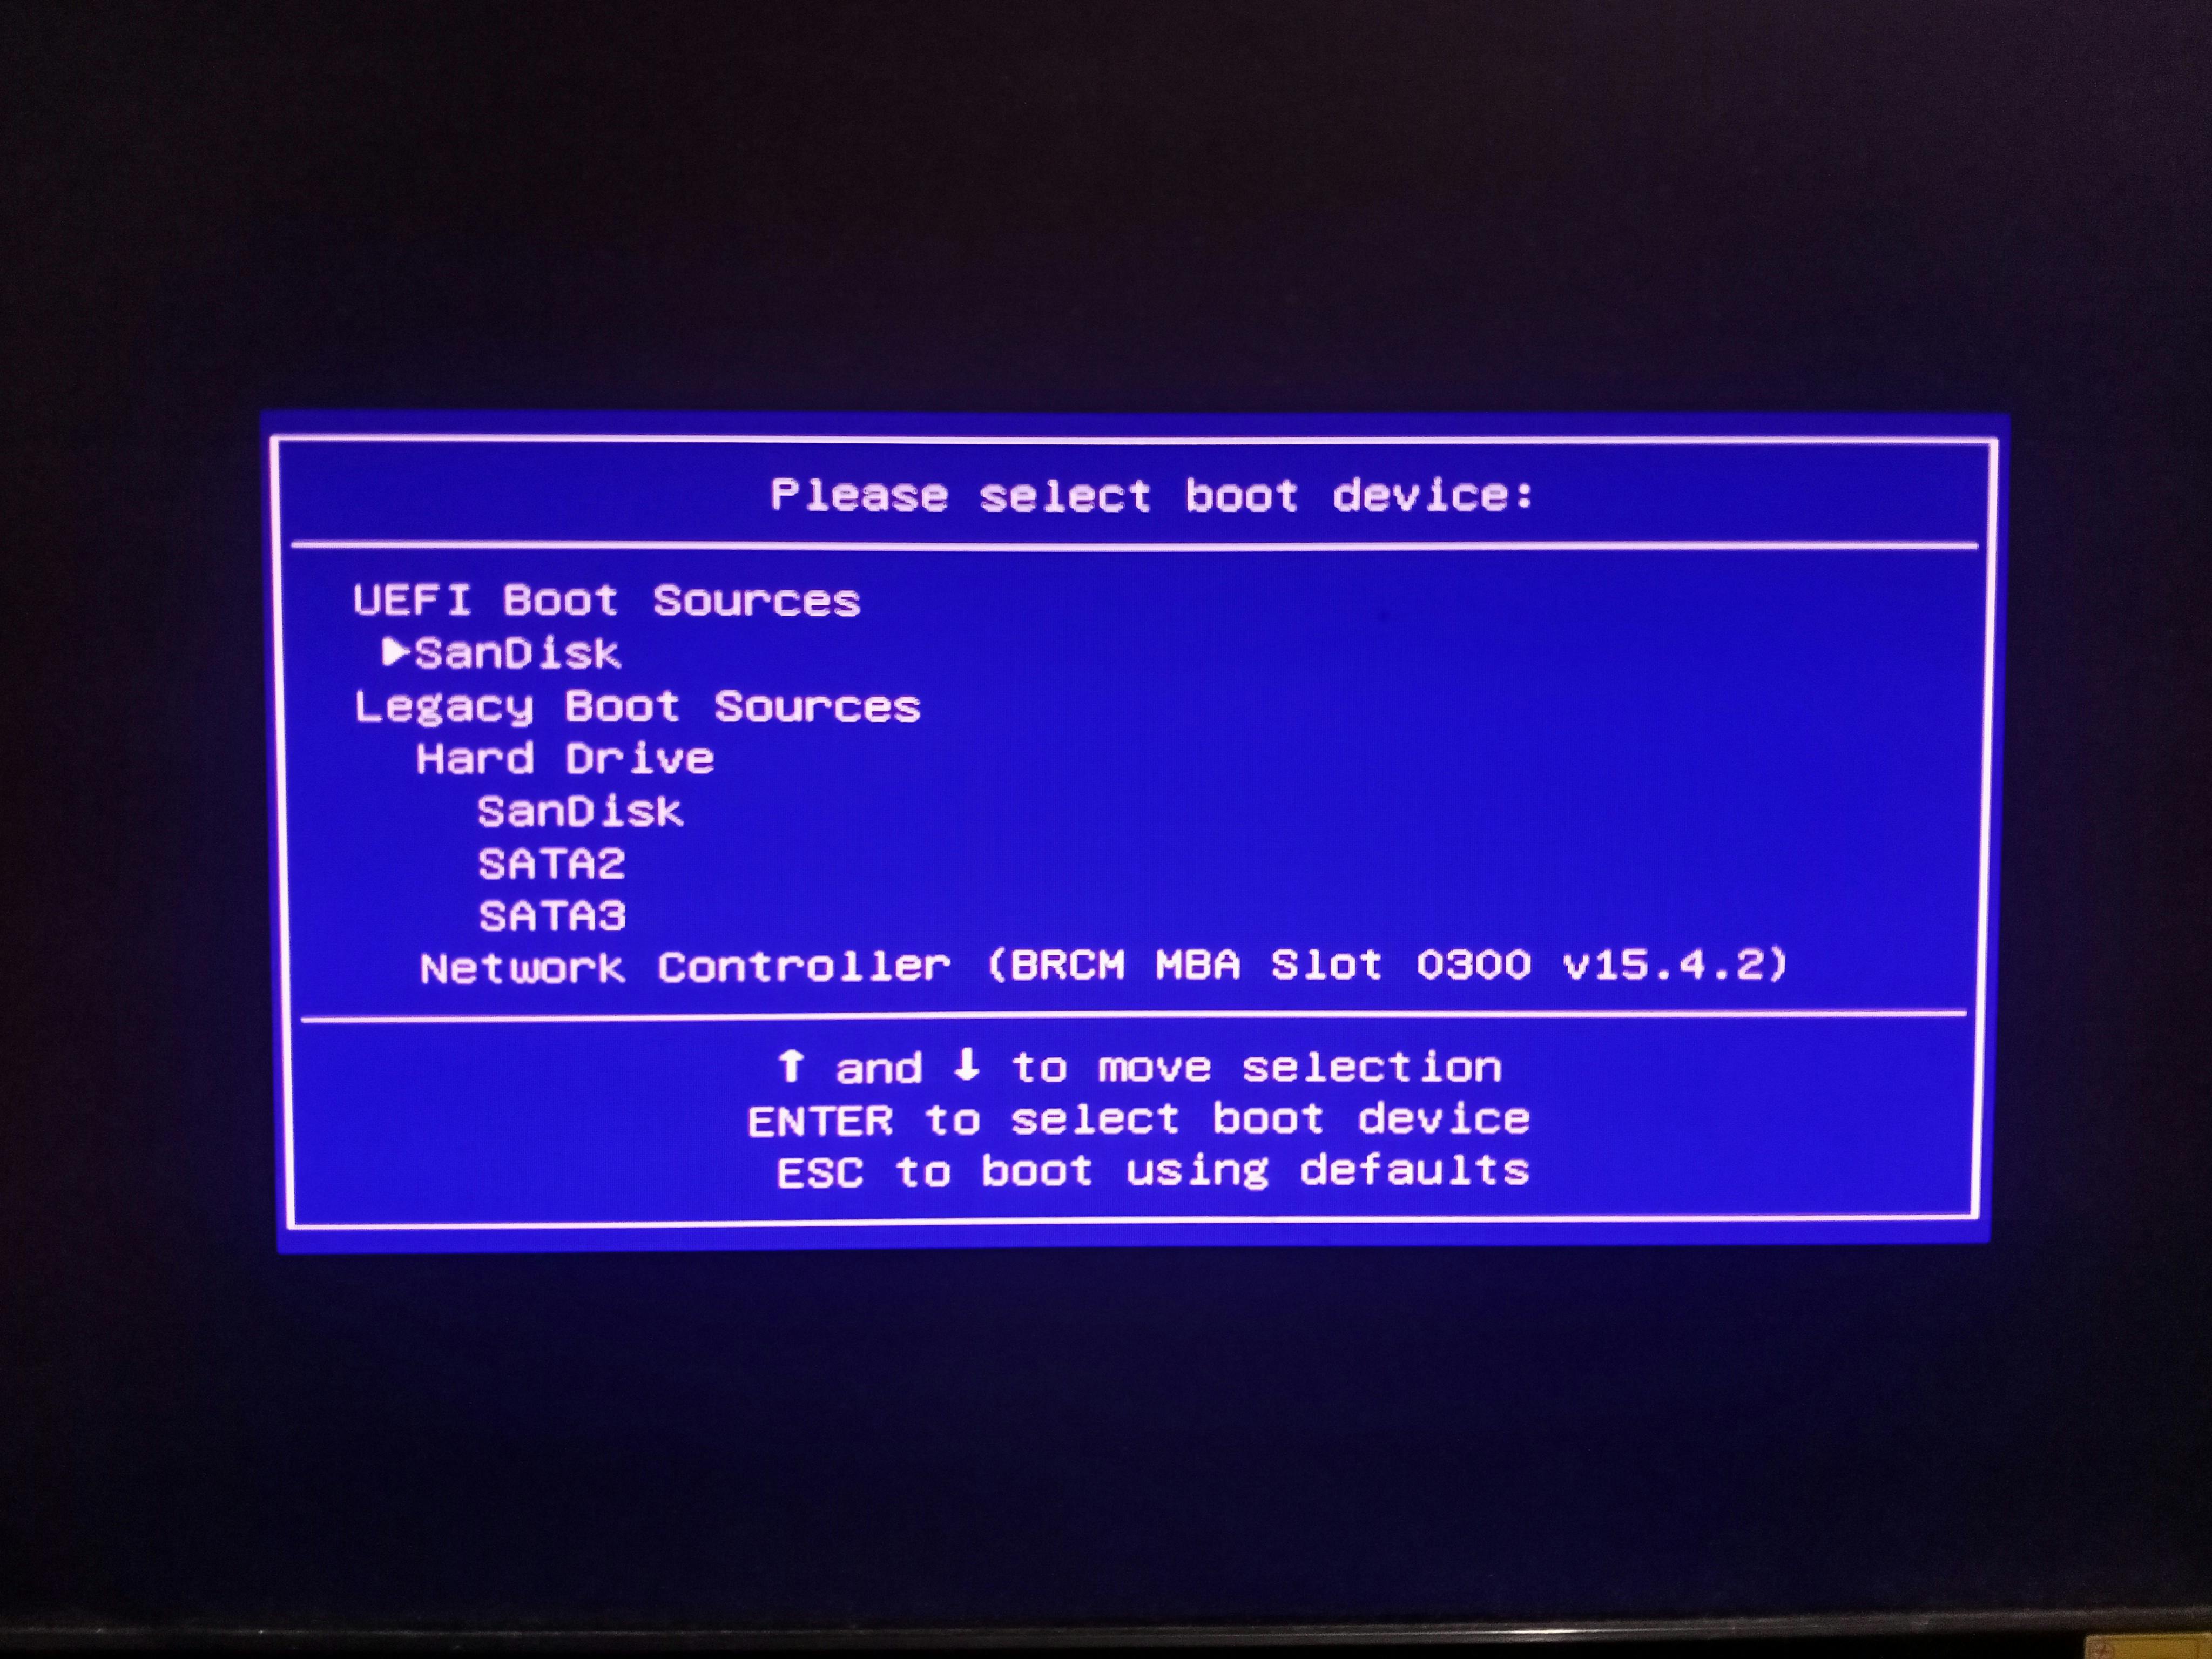
- Use the arrow keys to move the USB drive to the top of the boot order list, then press Enter.
The computer should now boot from the USB drive and load the Kali Linux installation process. Follow the on-screen instructions to complete the installation.
Note: If you cannot boot from the USB drive, you may need to enable the option to boot from USB in the BIOS or UEFI settings. Consult your computer's documentation or do an online search for instructions on how to do this.
Follow these Processes to complete the full installation:
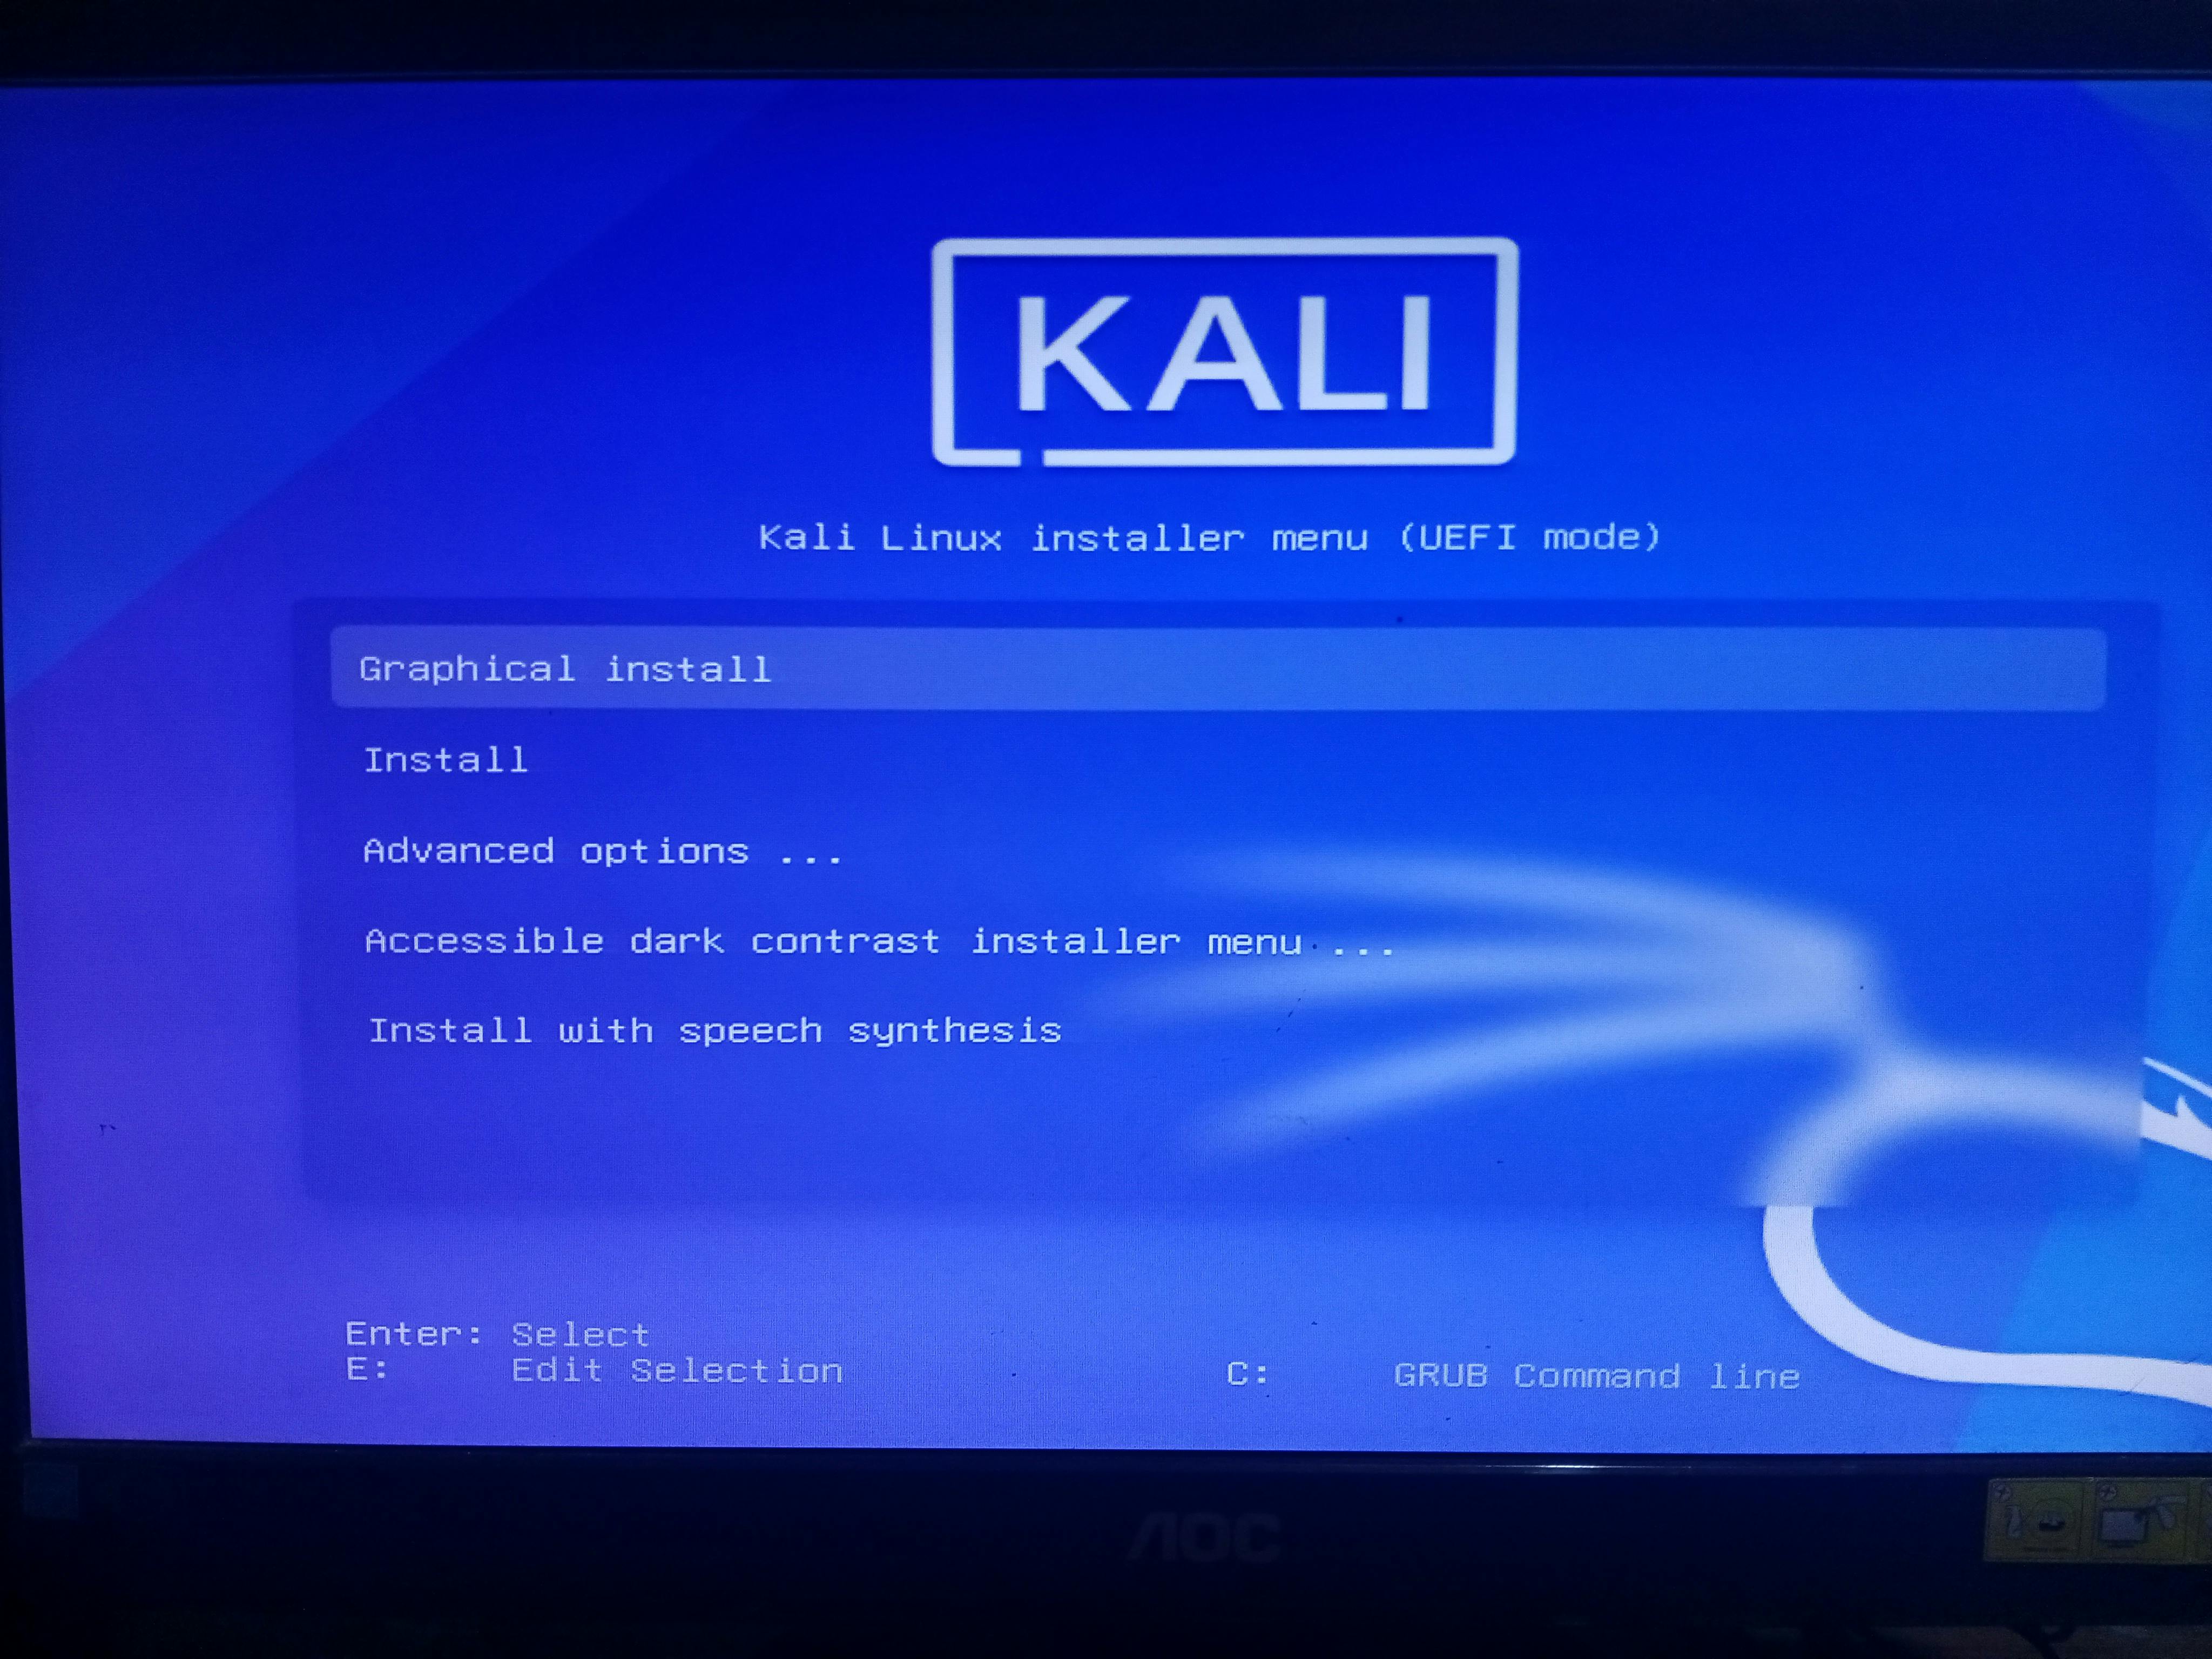
- First, select the Graphical Install
- Select the Language that you want.

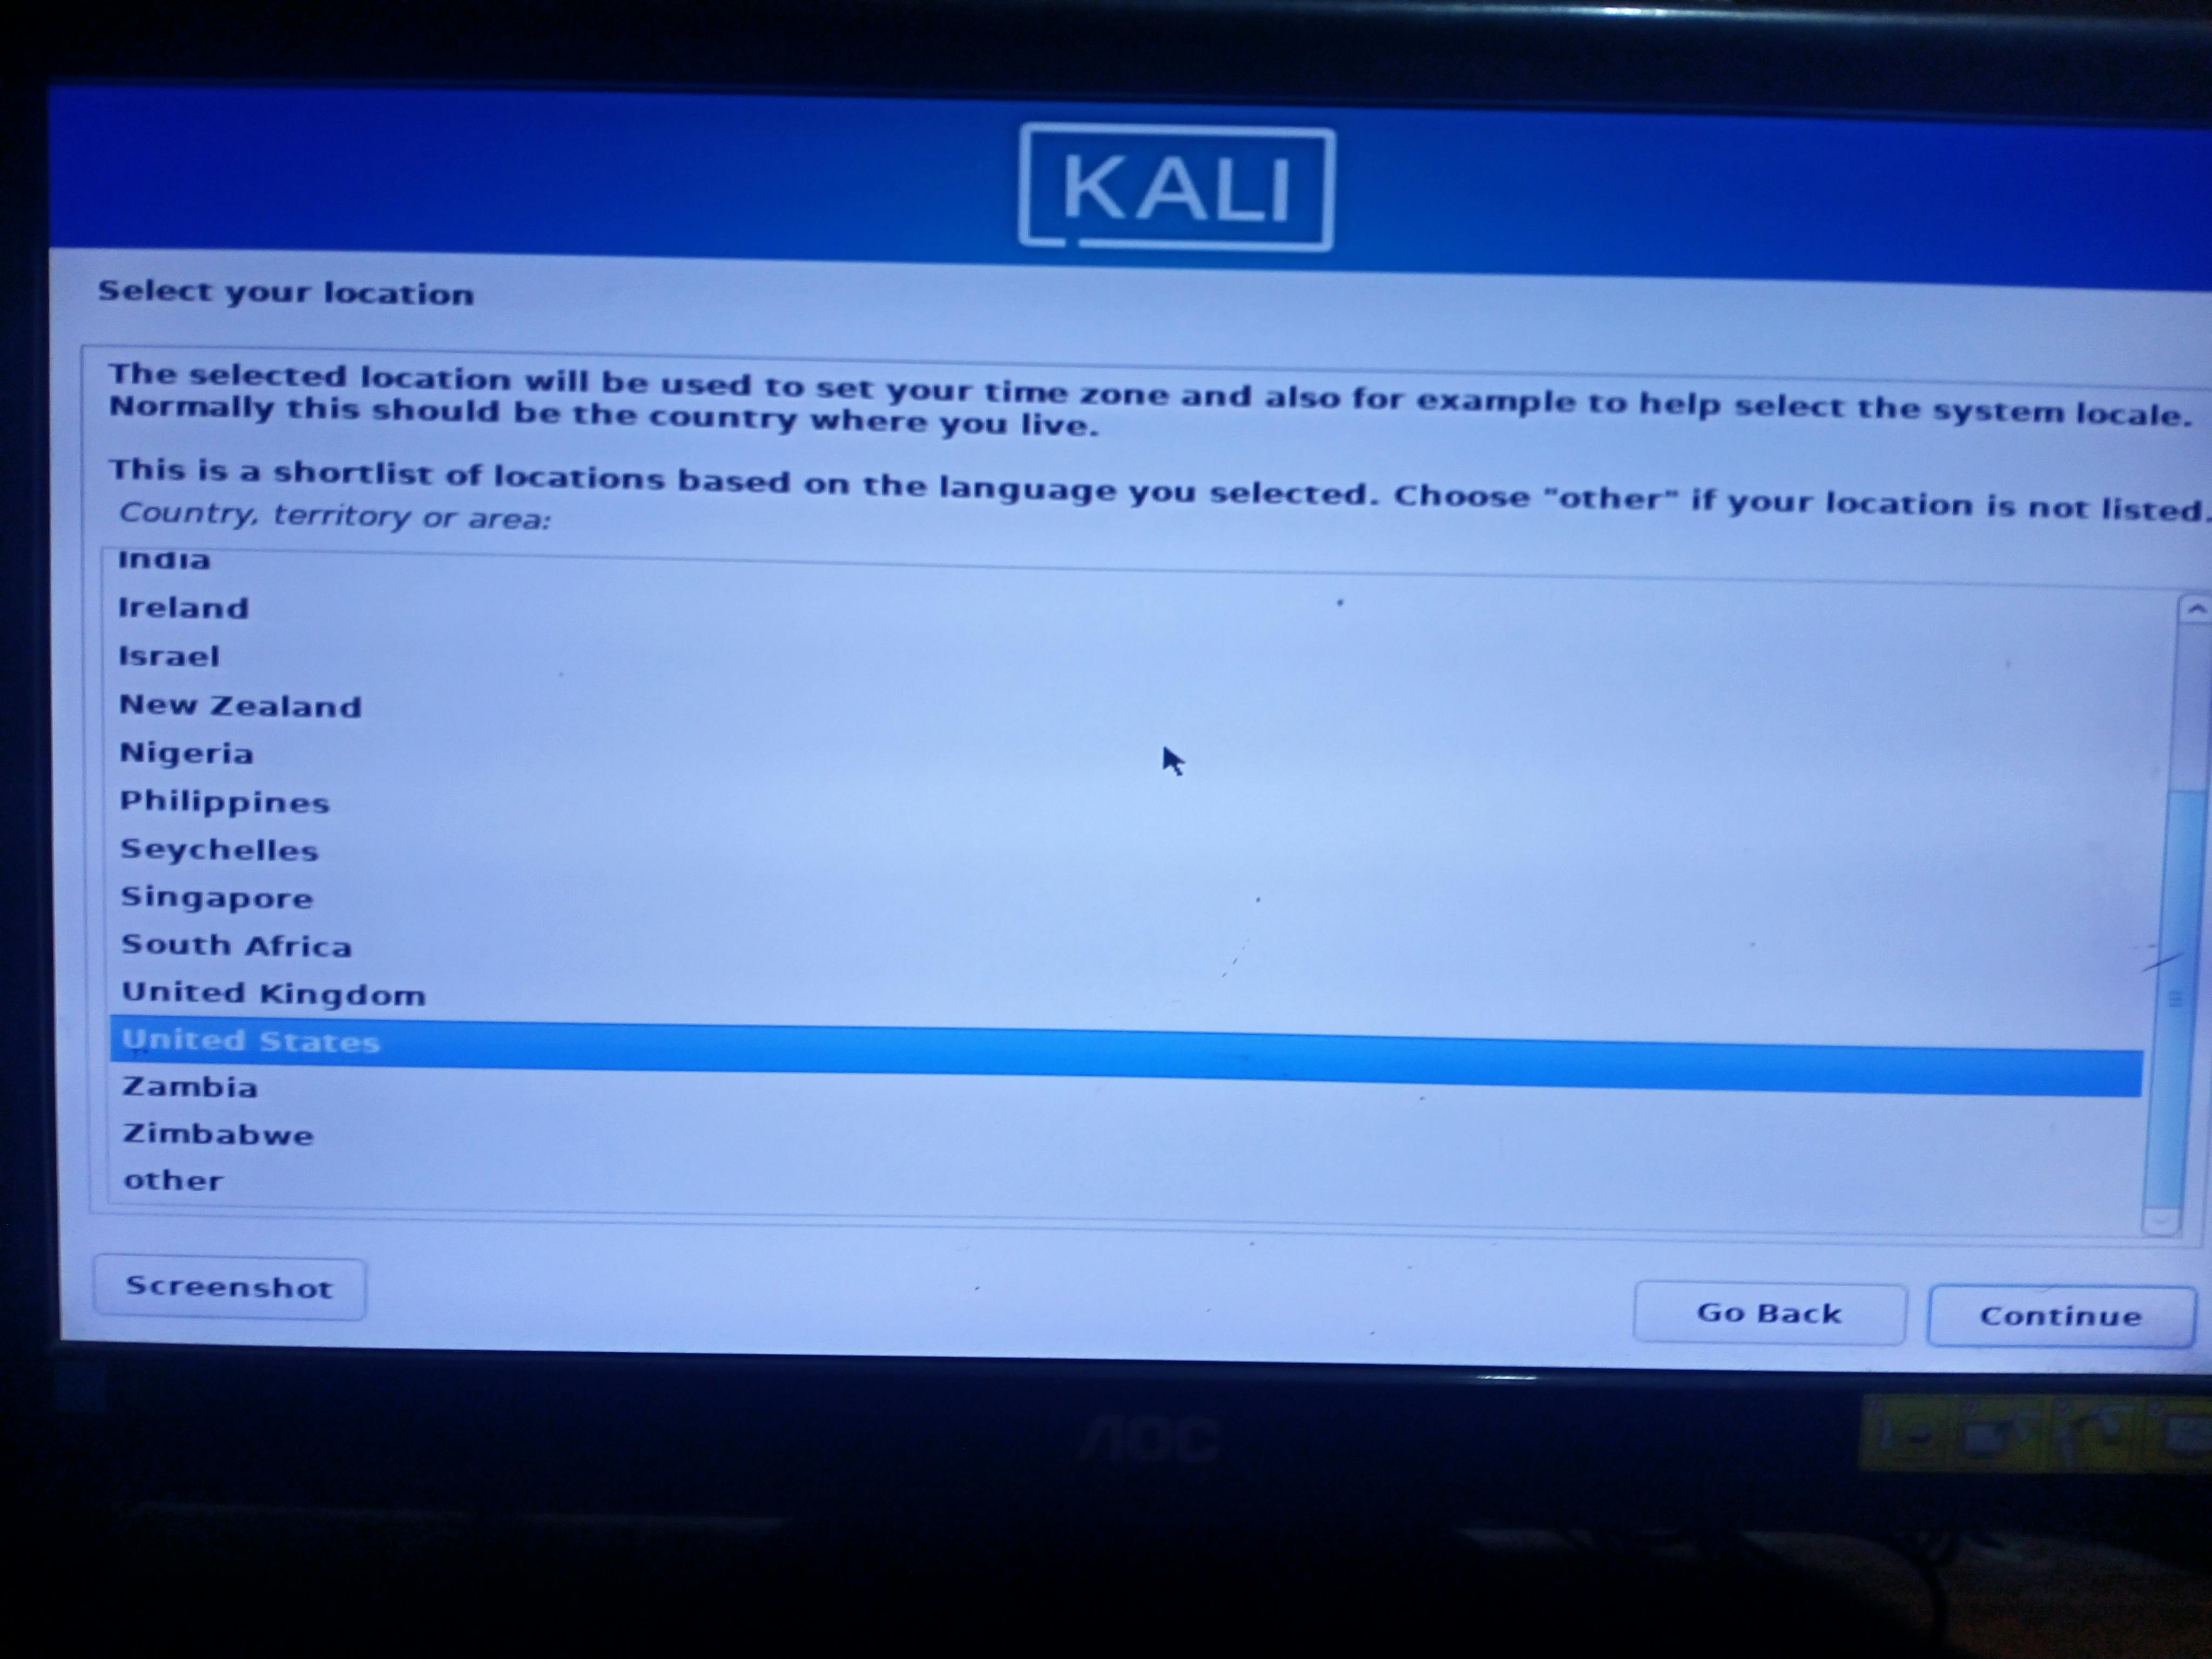
- Select your country & you will need to select the time zone according to your country.
- Select Keyboard type.

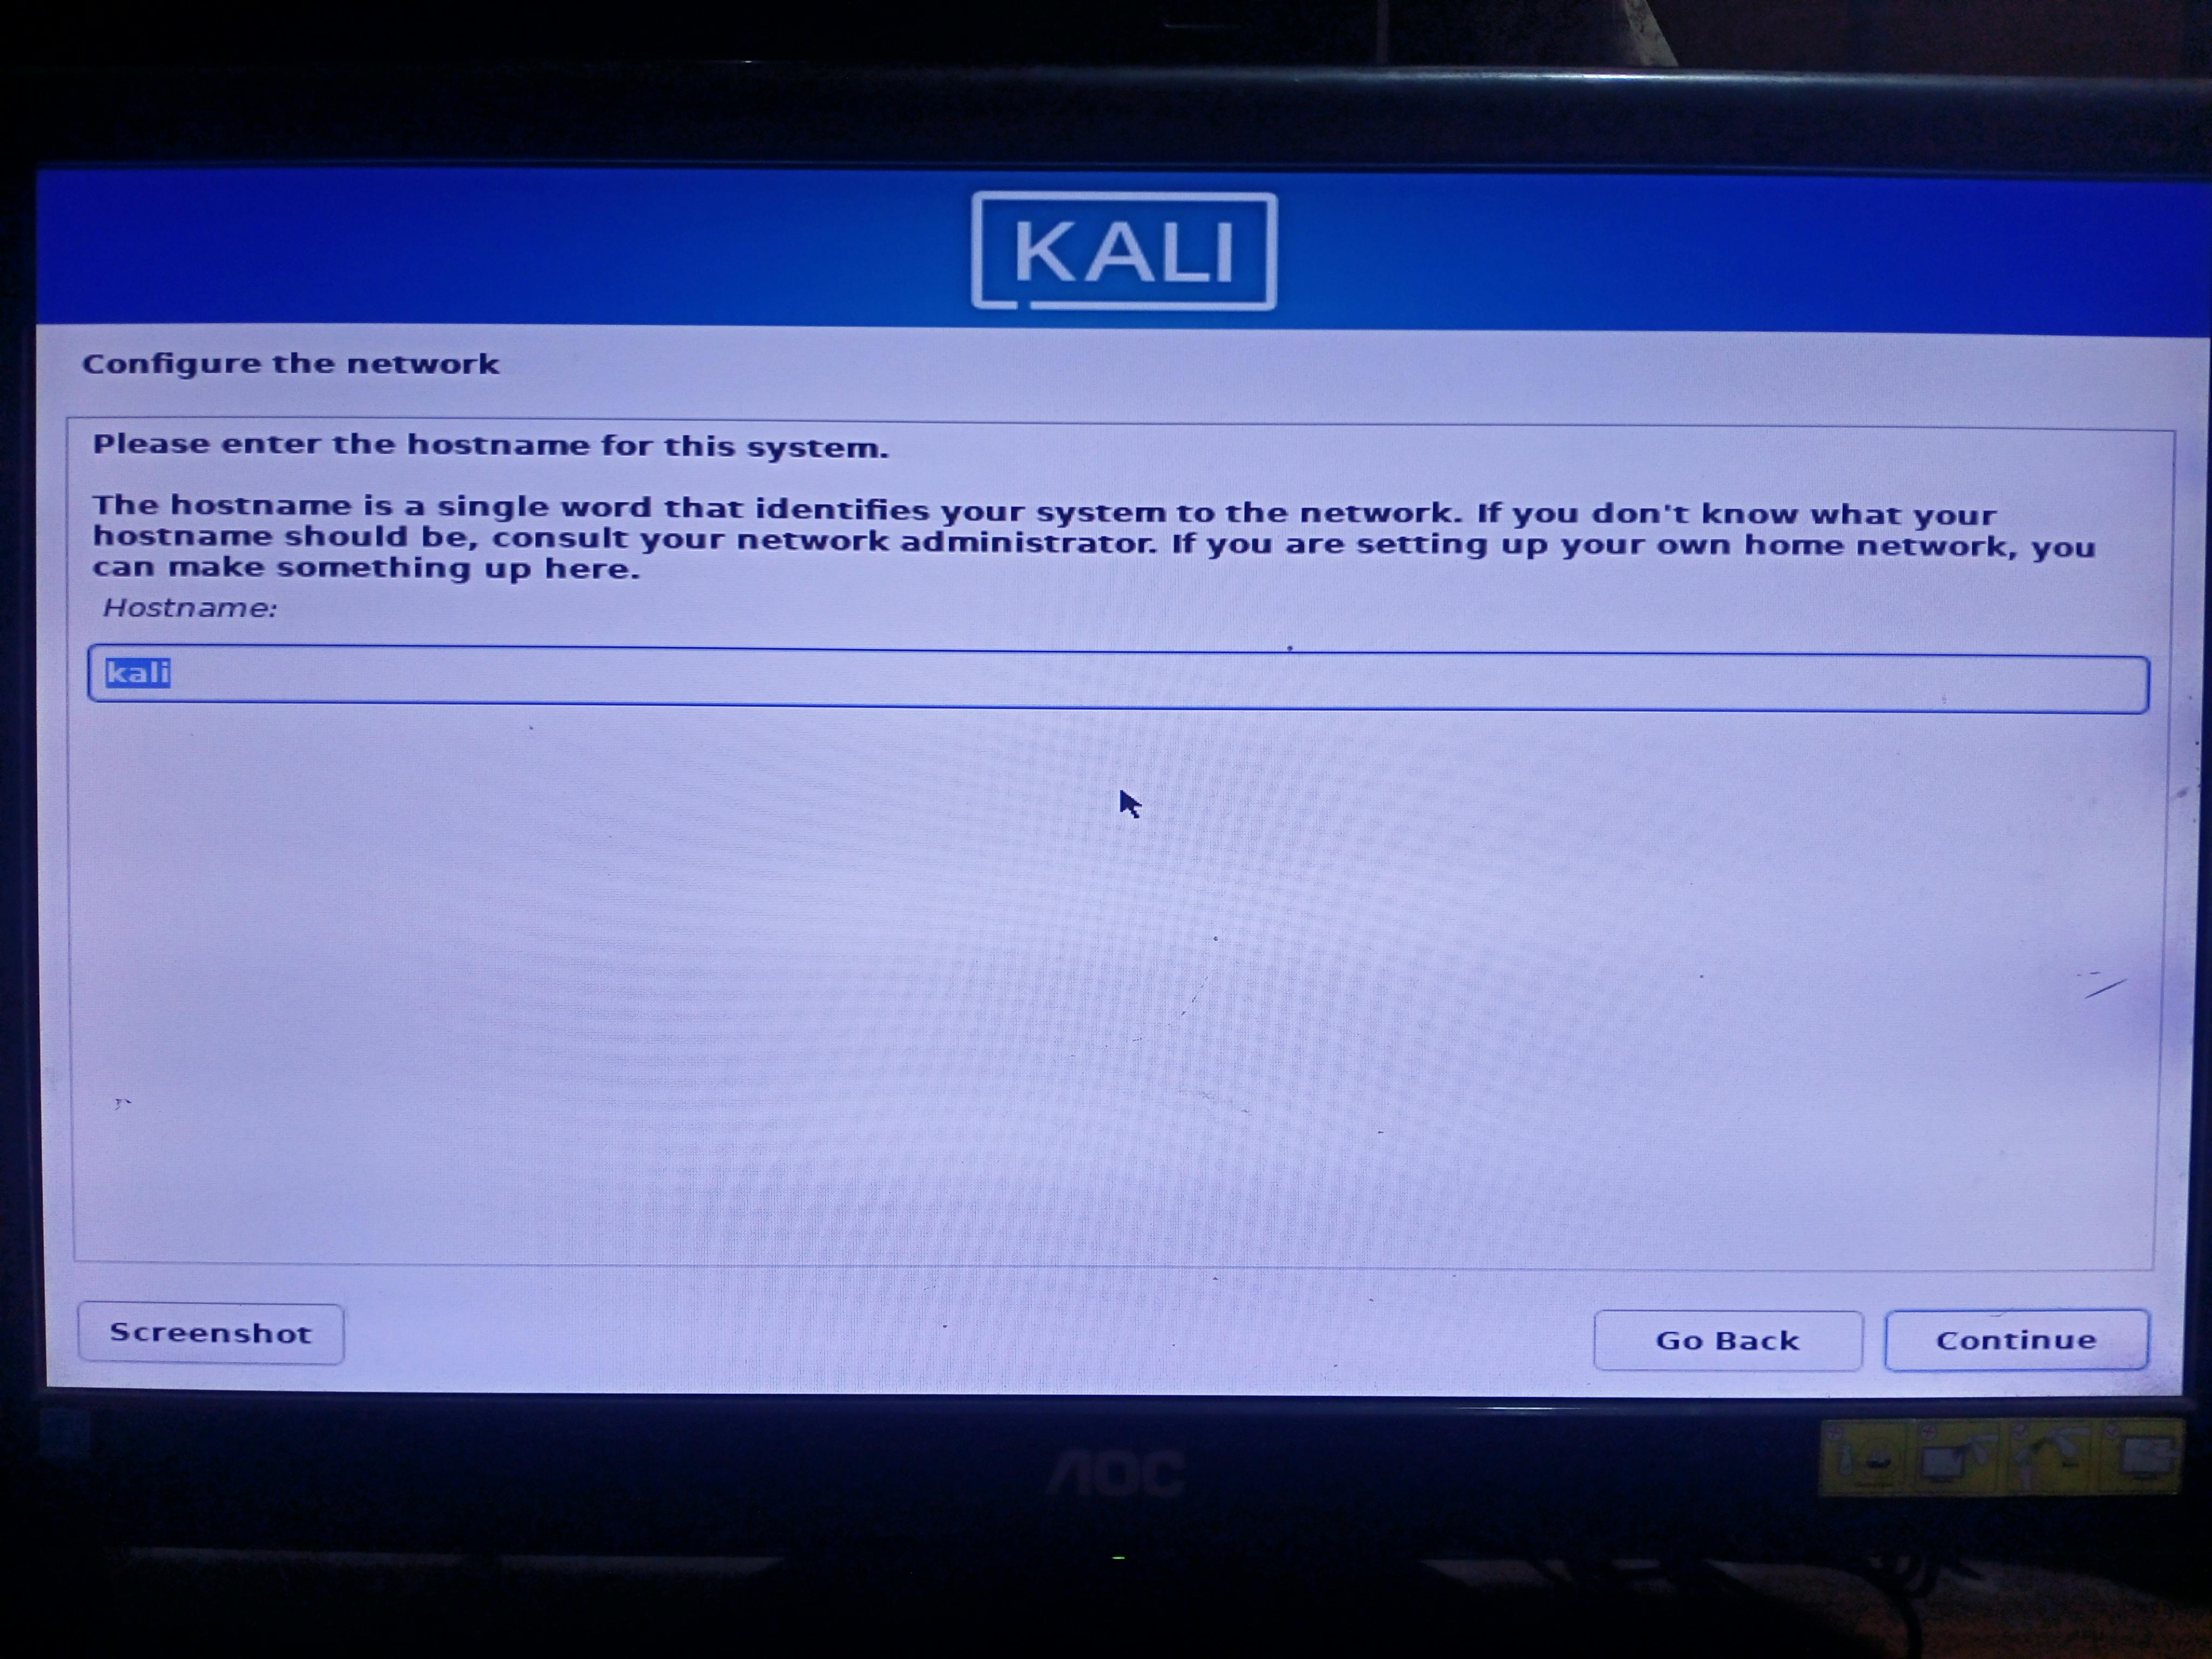
- Select hostname. It can be any name, I will use 'kali'.
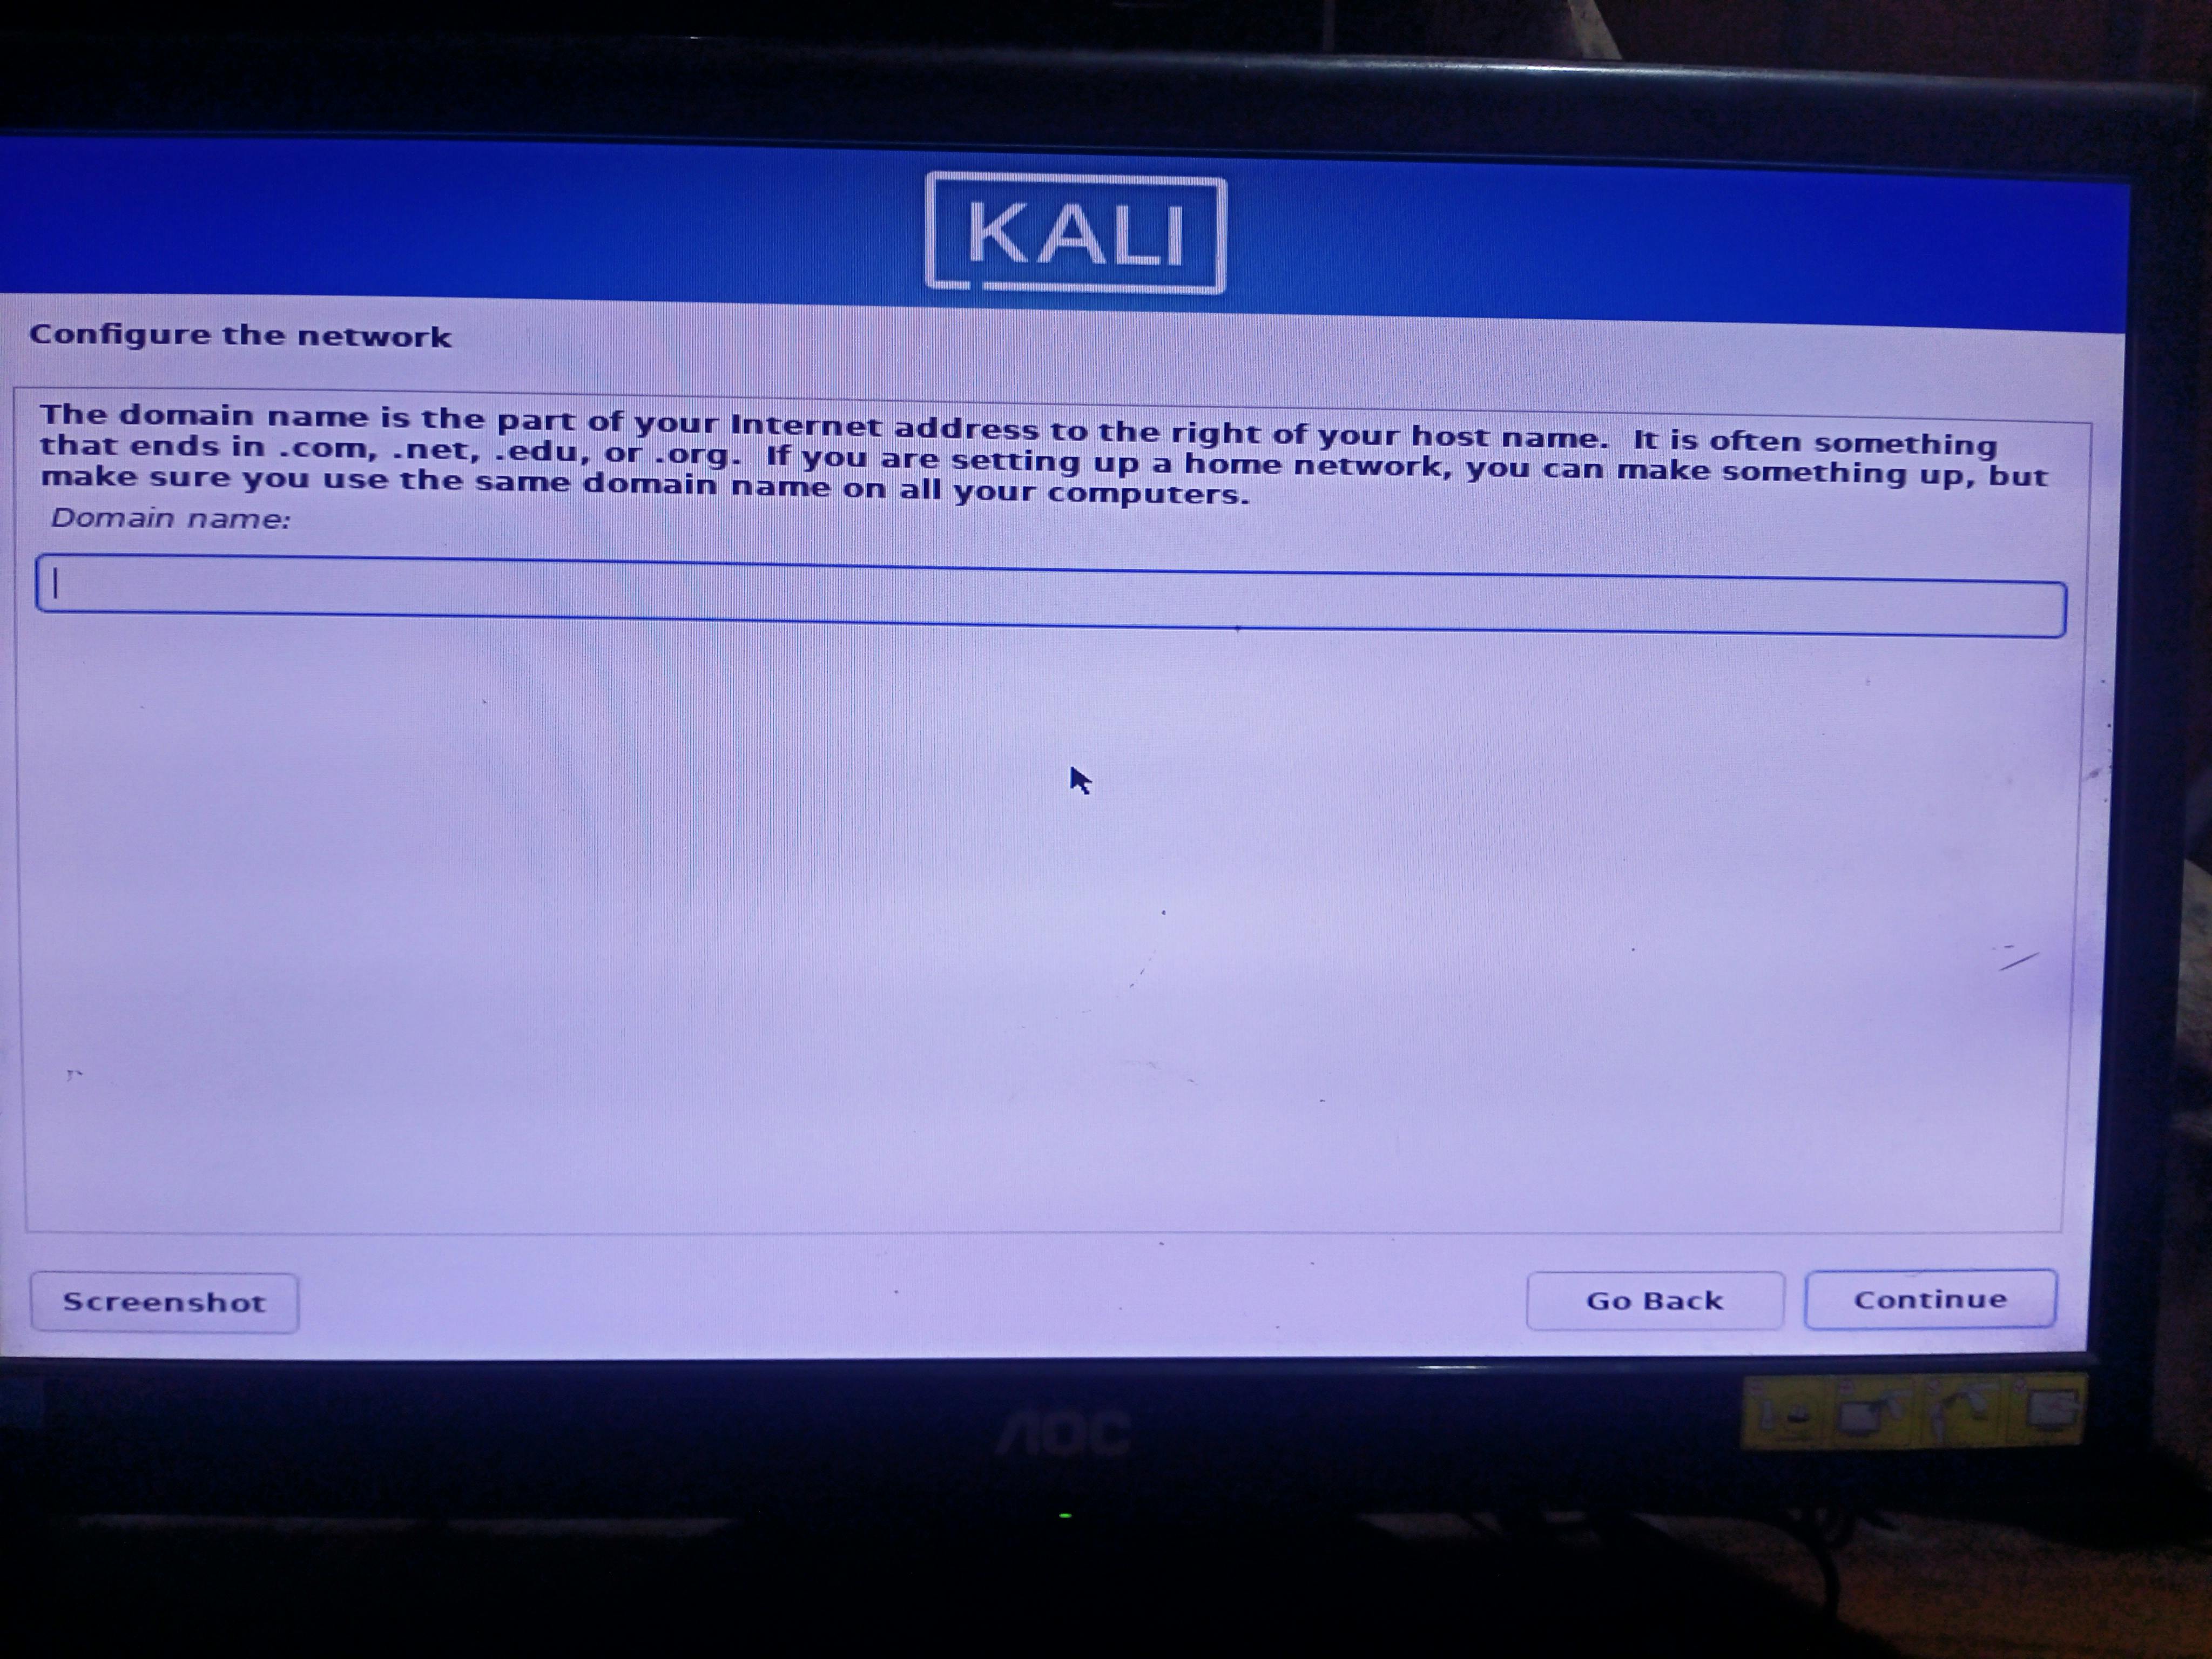
- Select the Domain name if you have otherwise you can skip it.
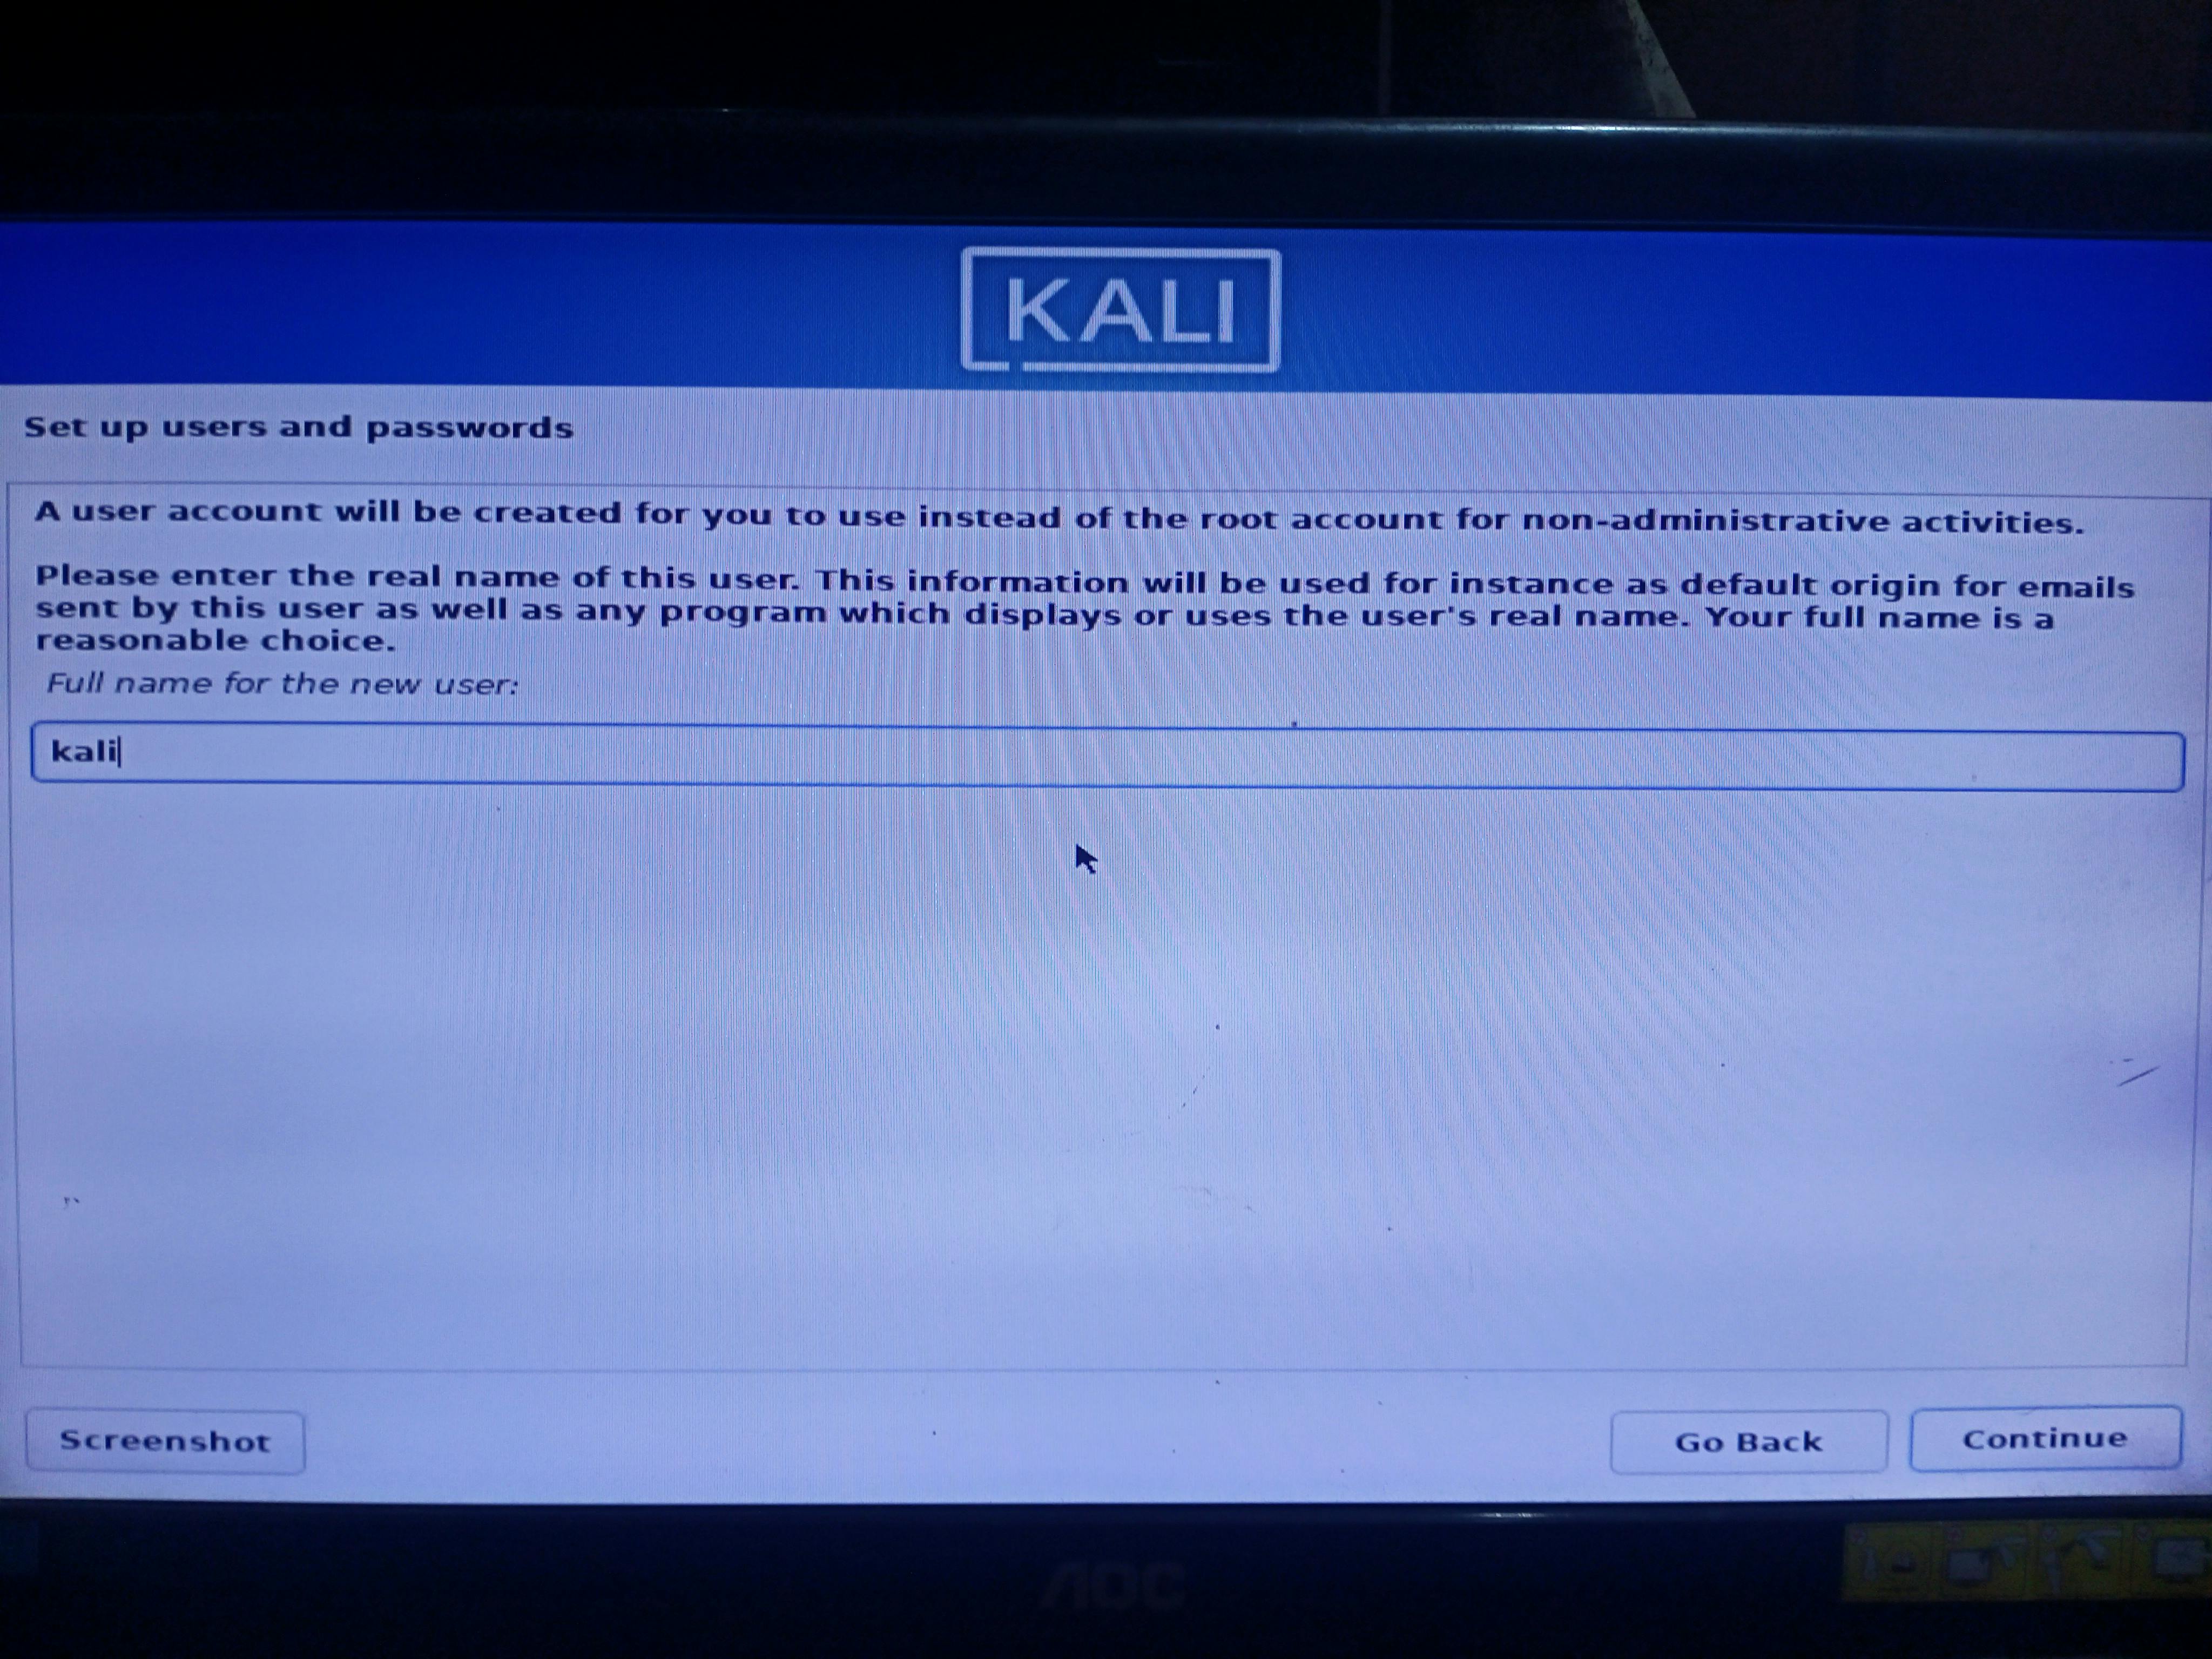
- Enter your Full name I will use 'Kali'
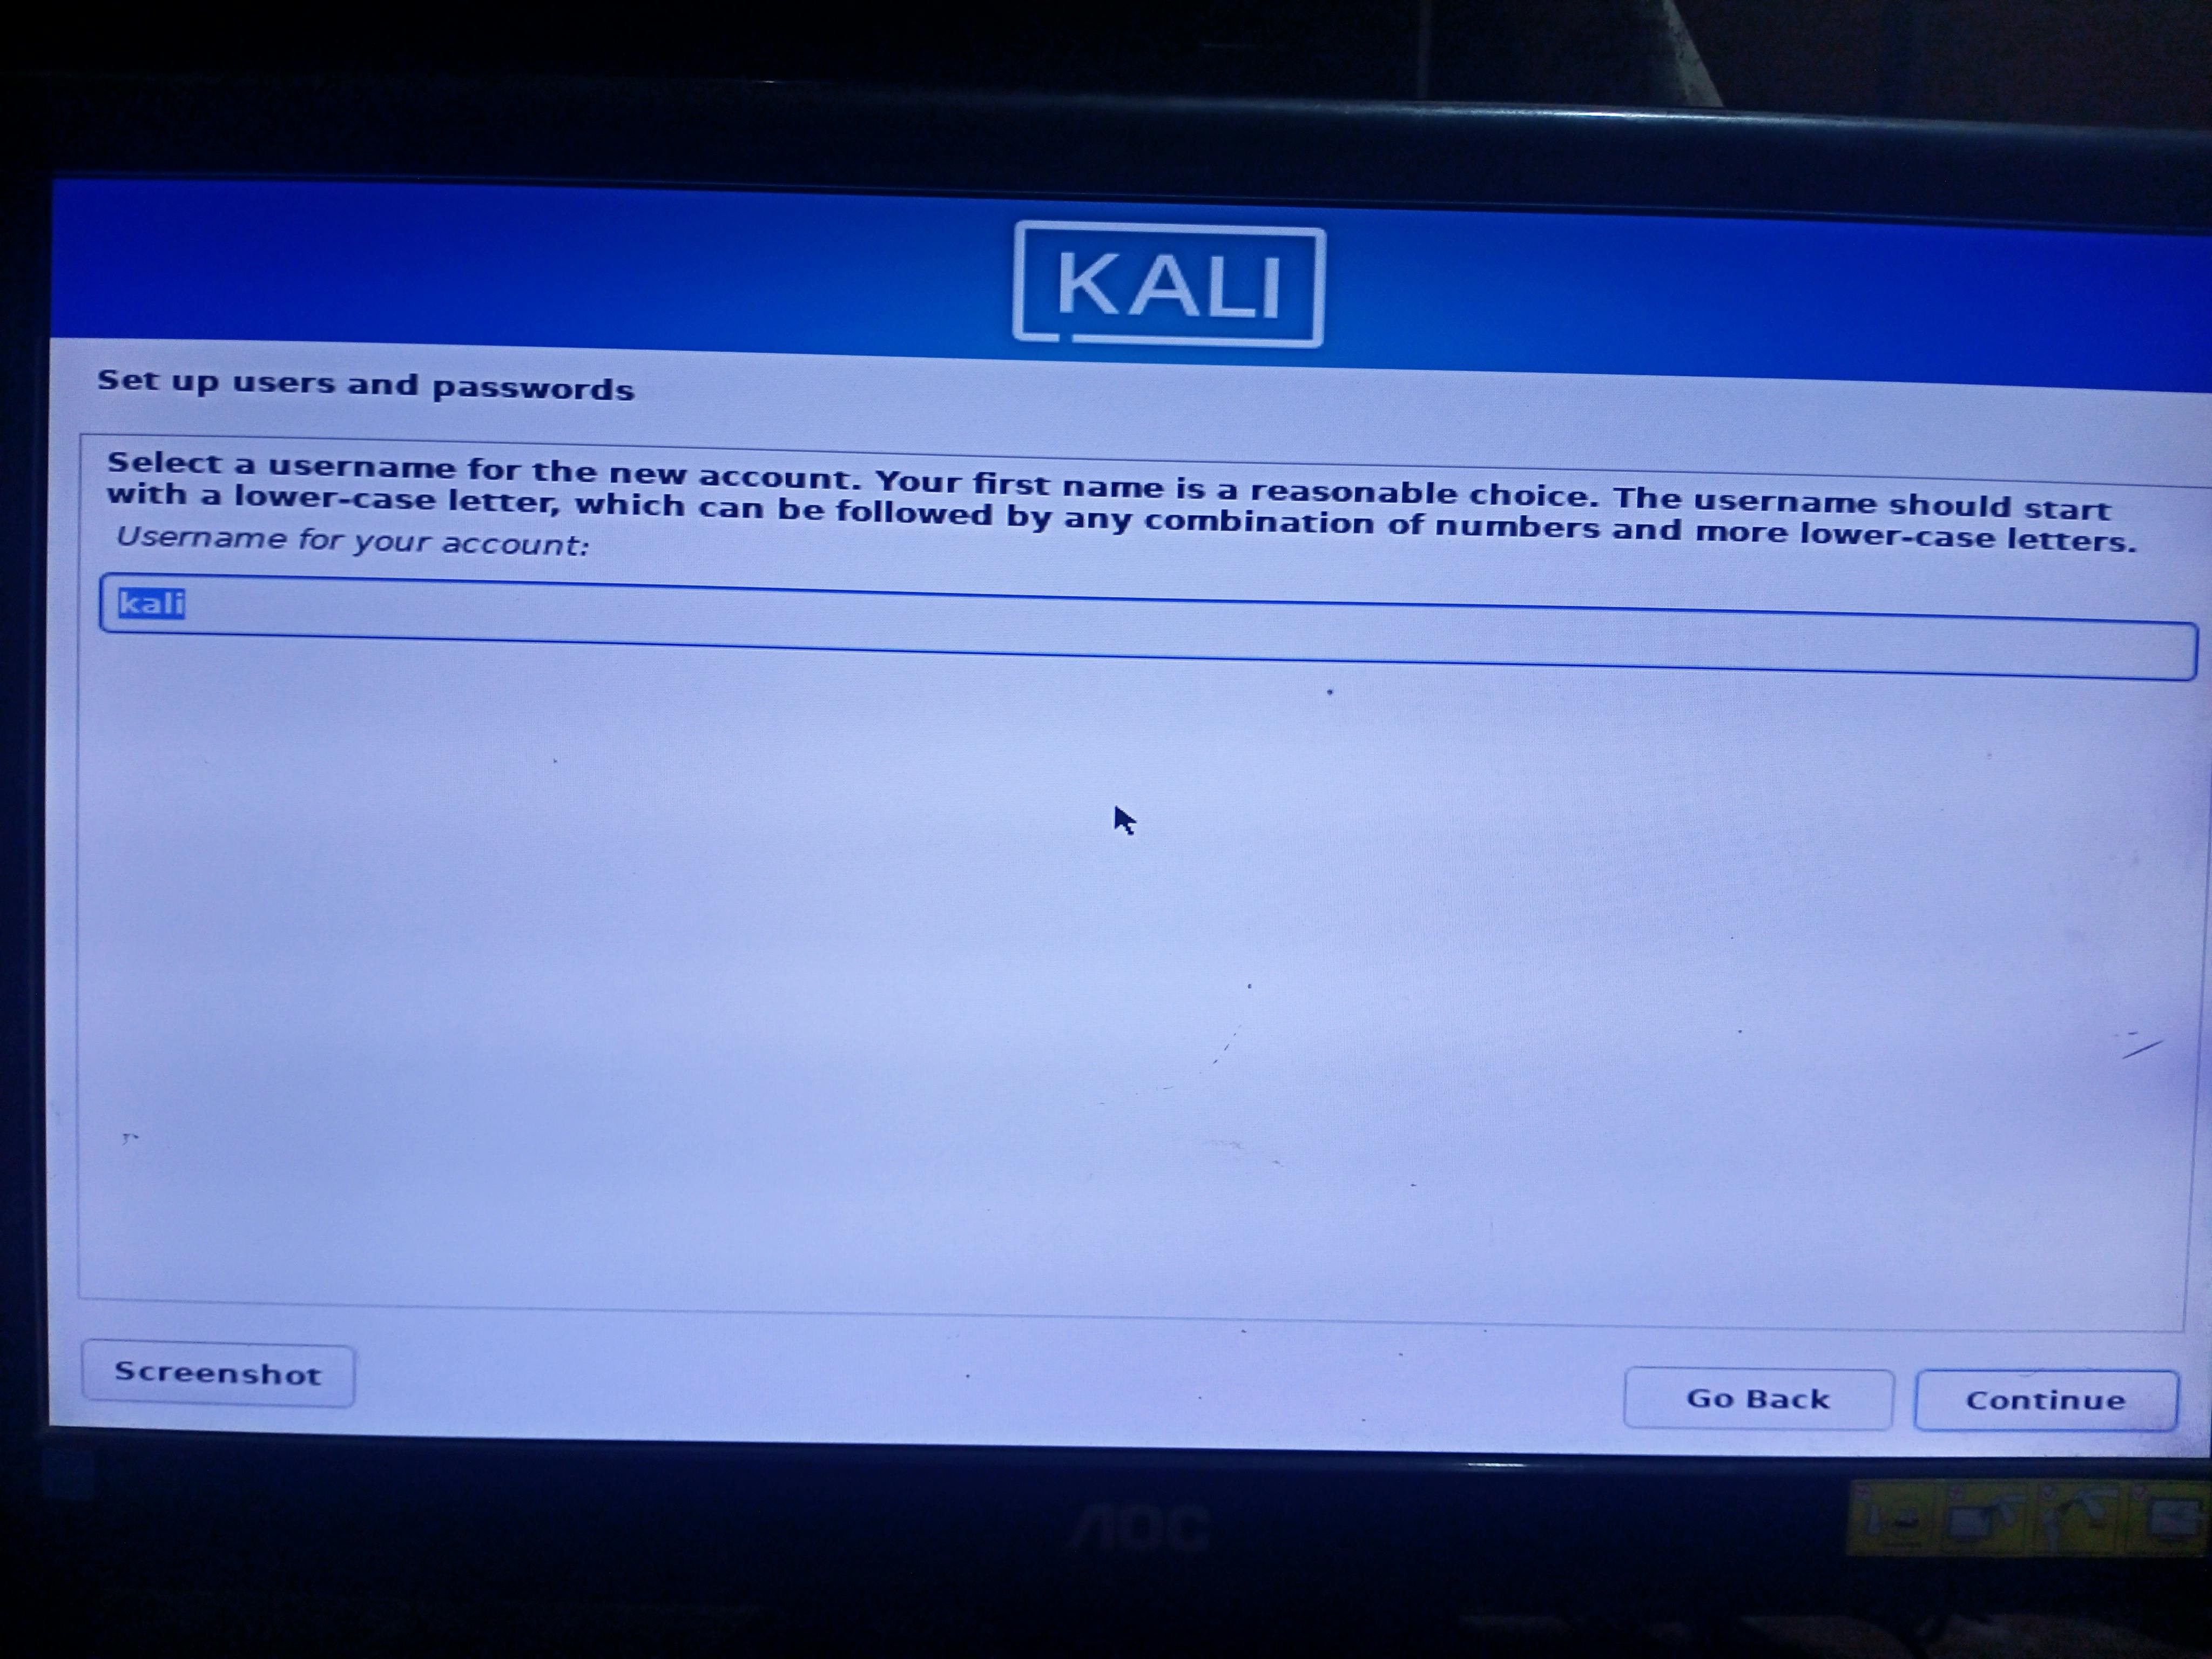
- Enter Username that you want to use. I will use 'kali'
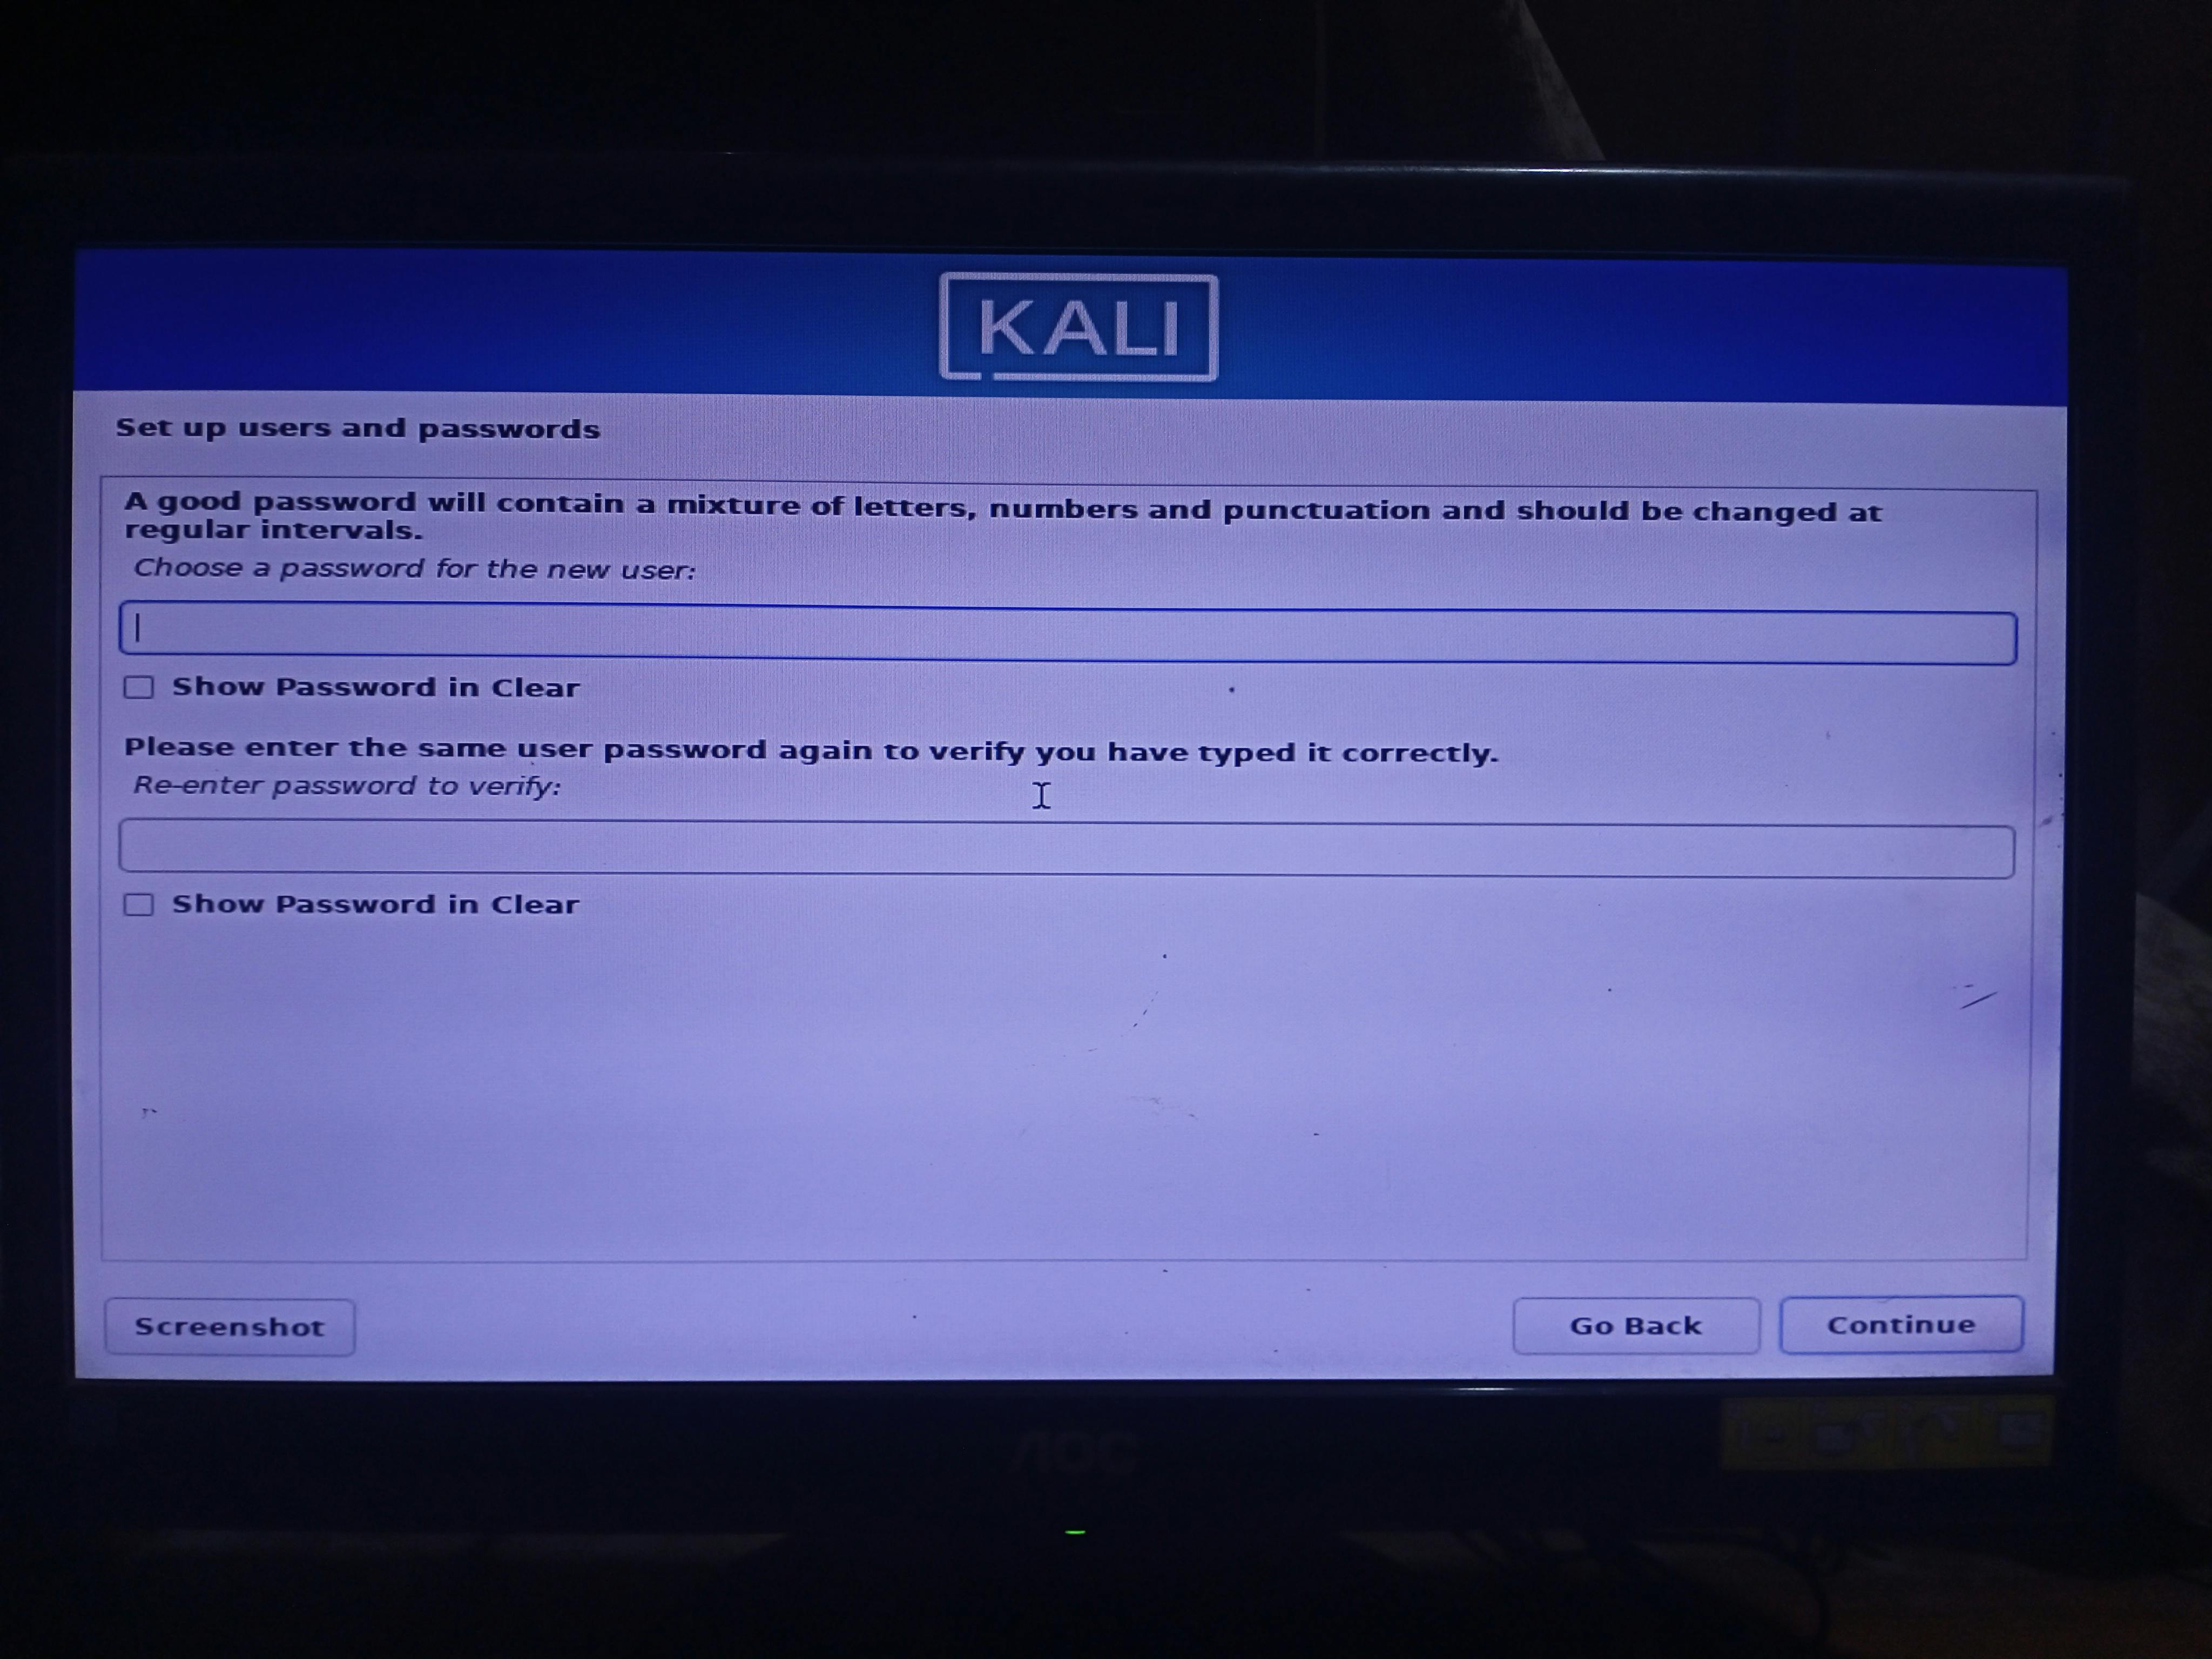
- Create a password that you need to use later such as login.
After completing these steps select your Time Zone. [You will see the time zone setting]
Select Guided - Use the entire disk if you are a newbie. Also, I will go with this.
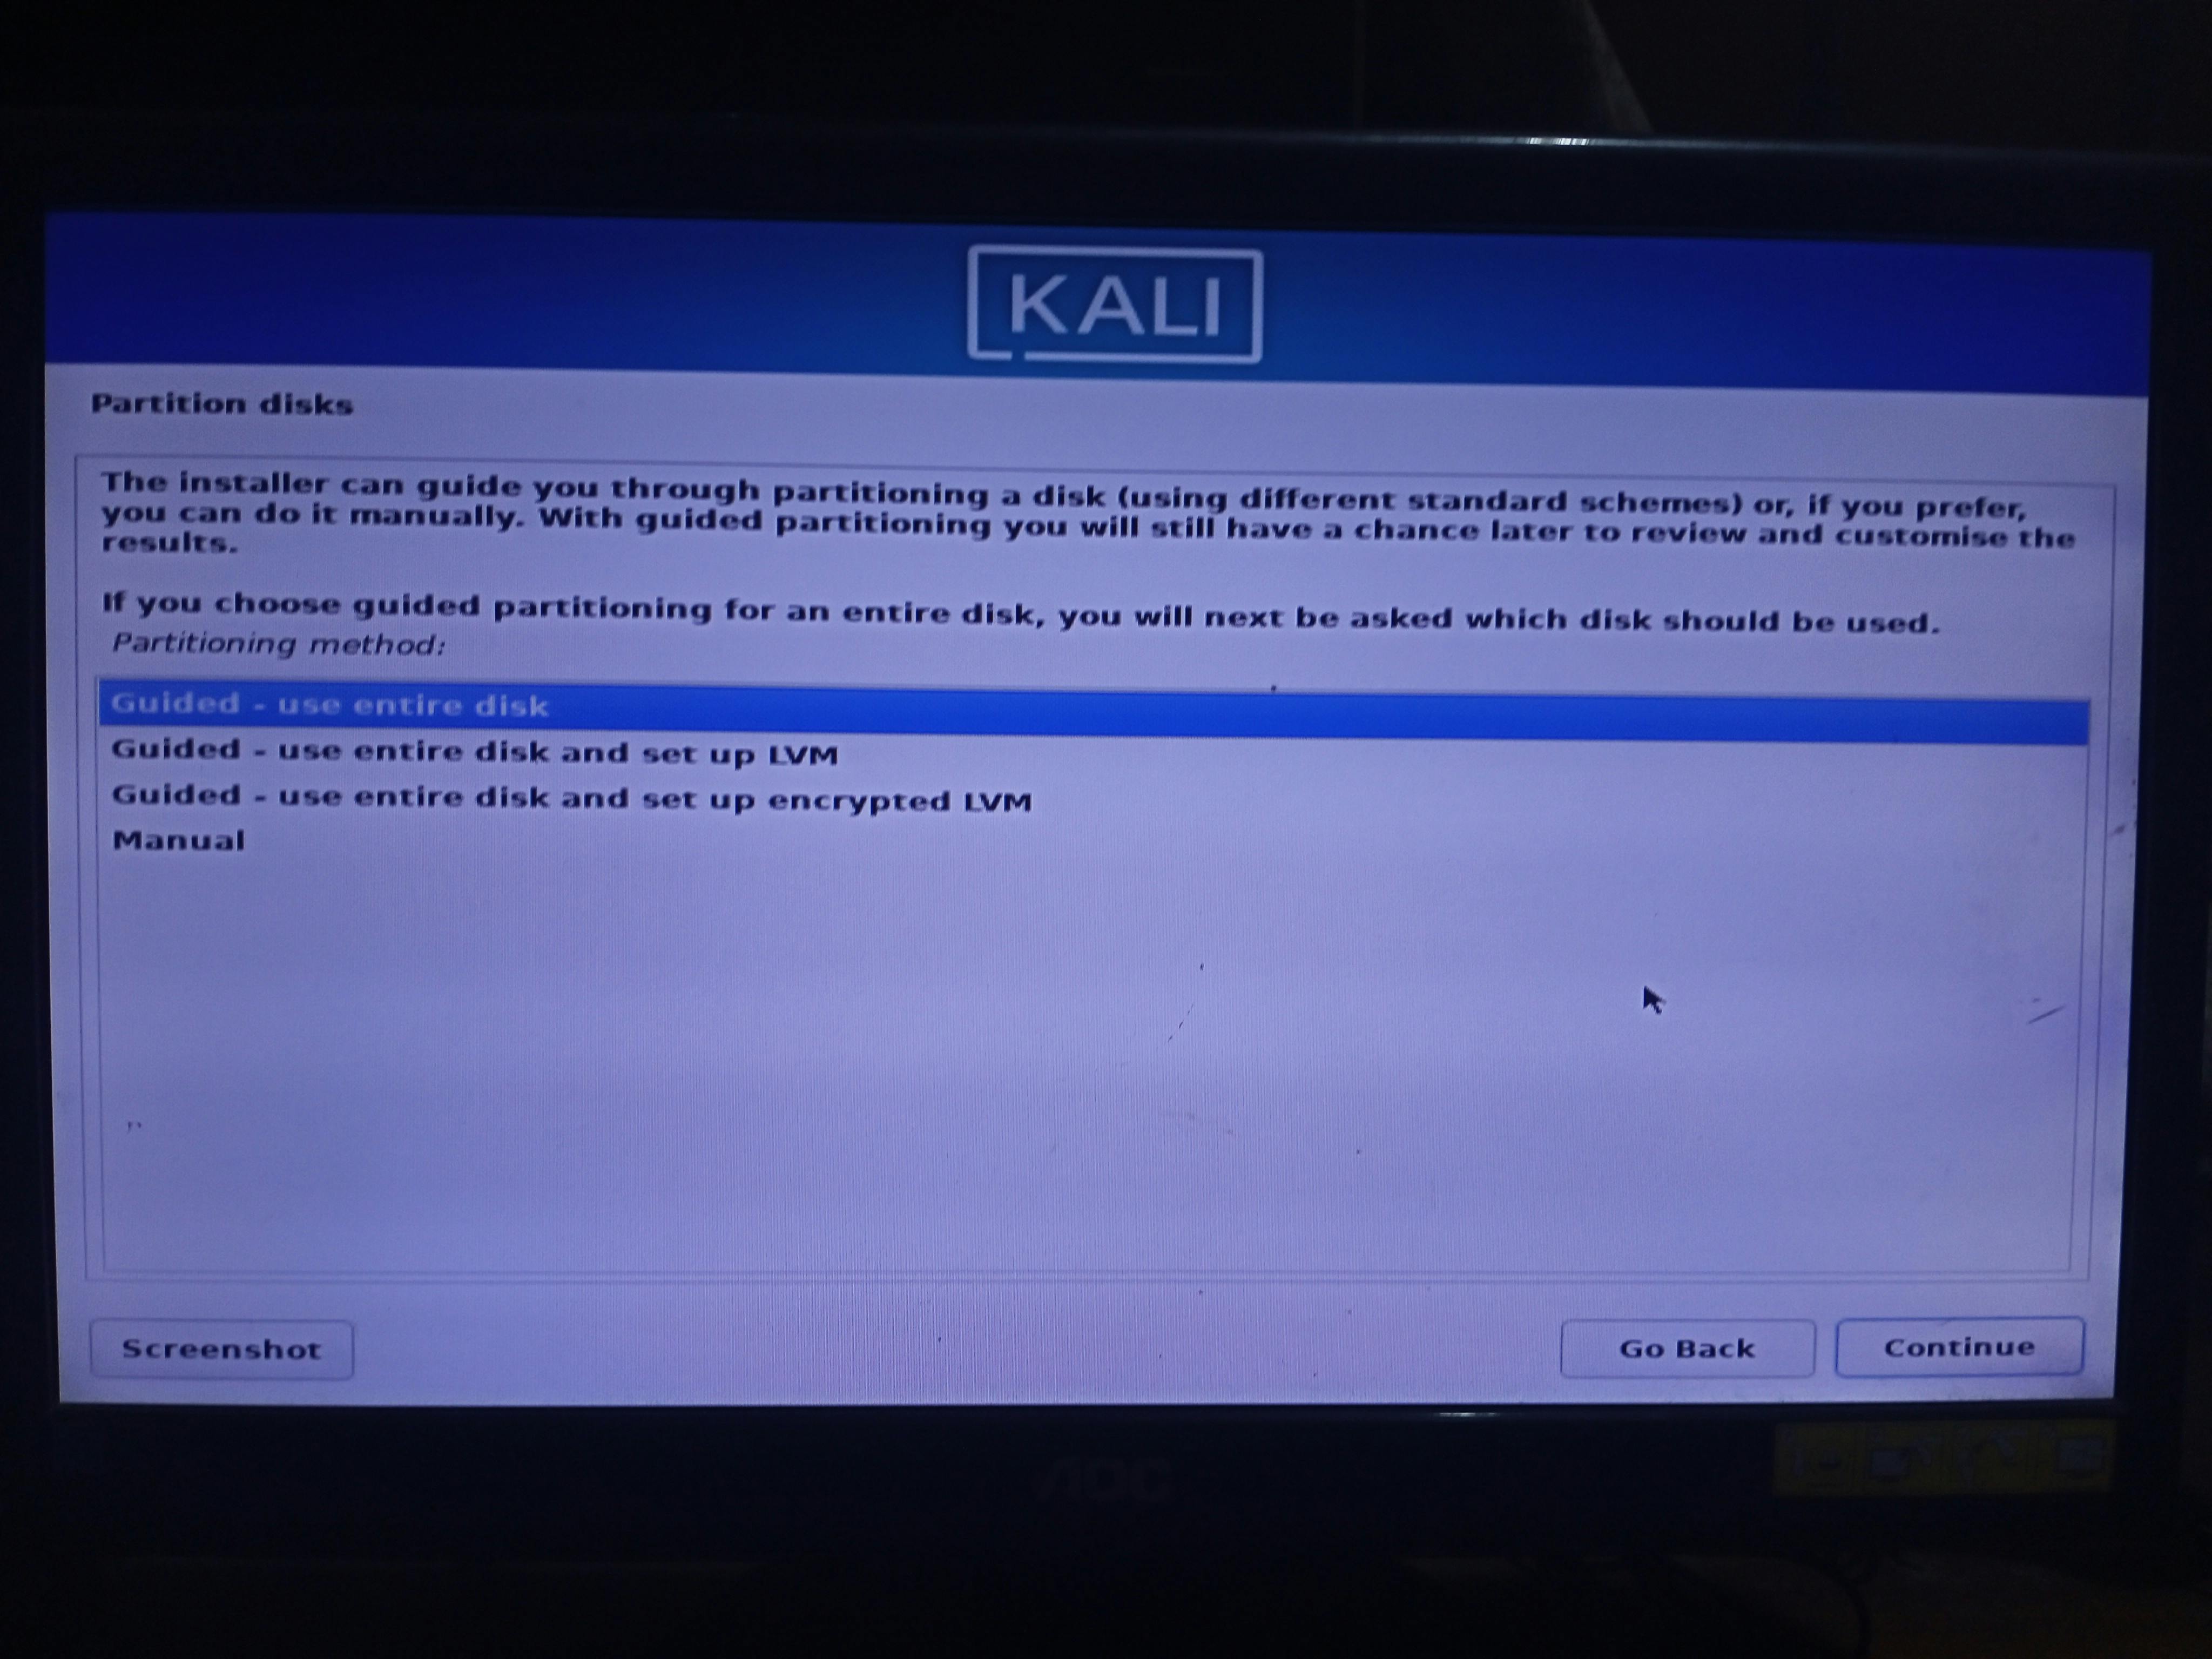
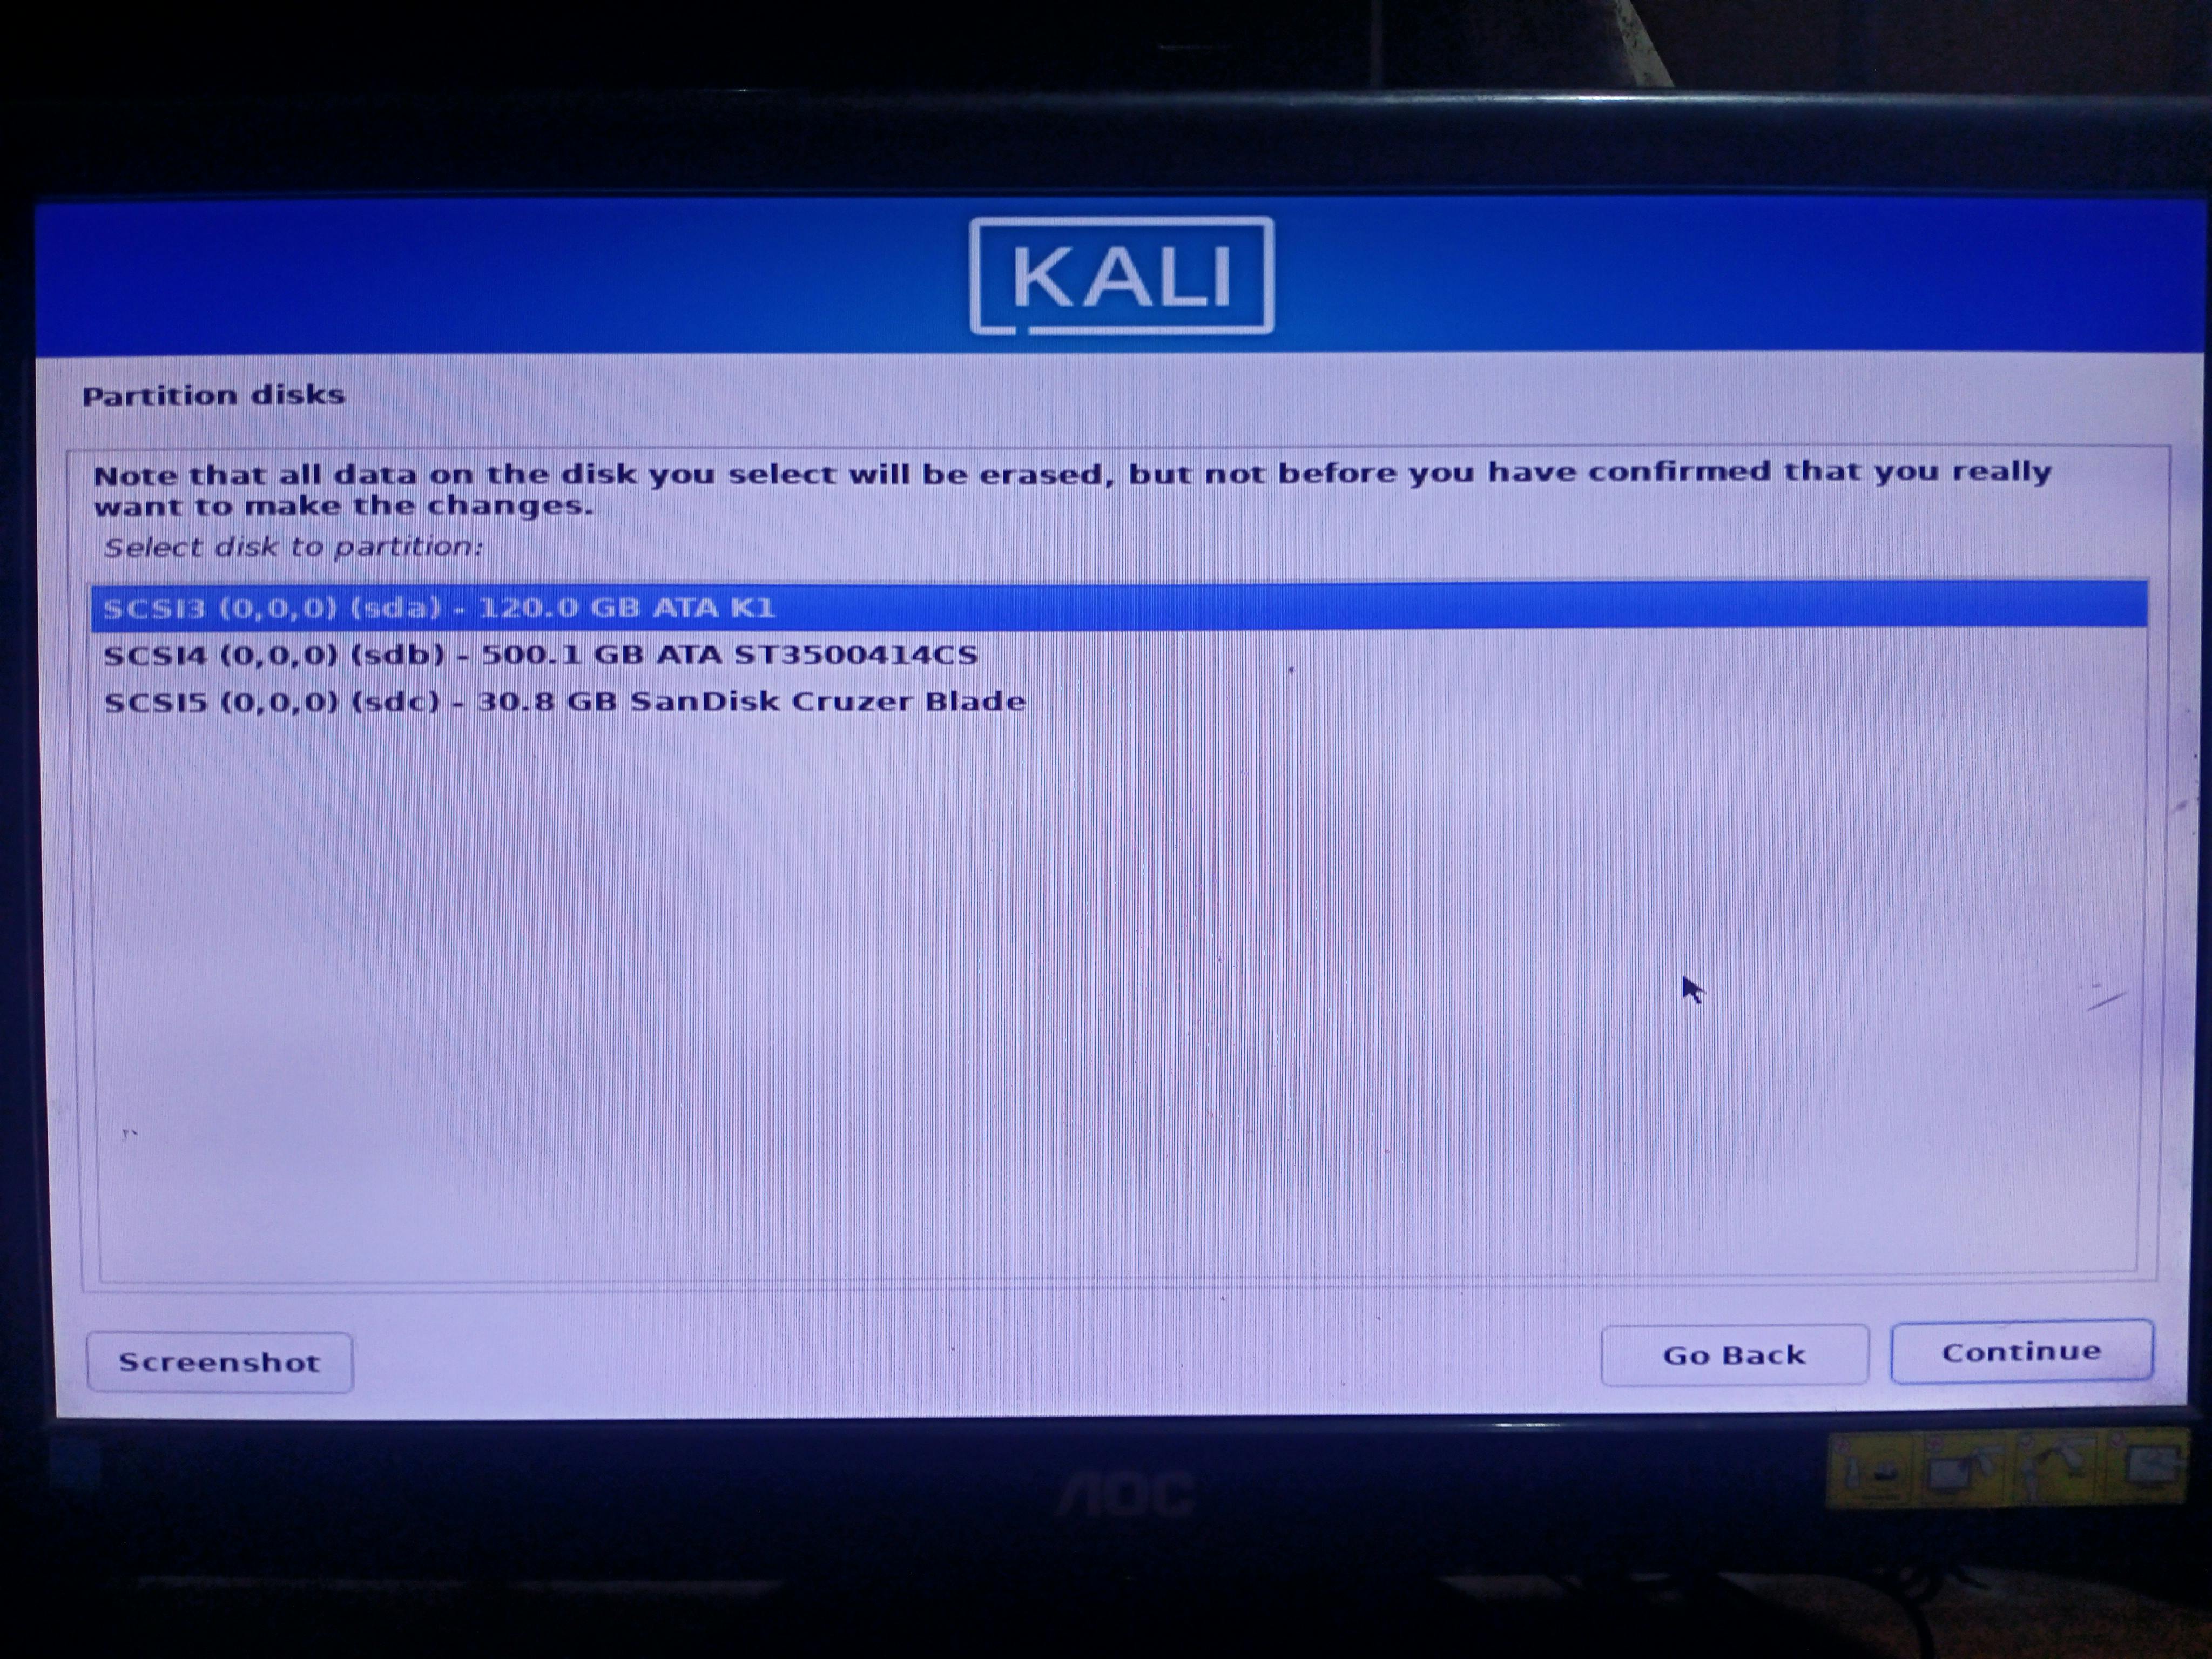
- Select the disk to be partitioned and click on continue
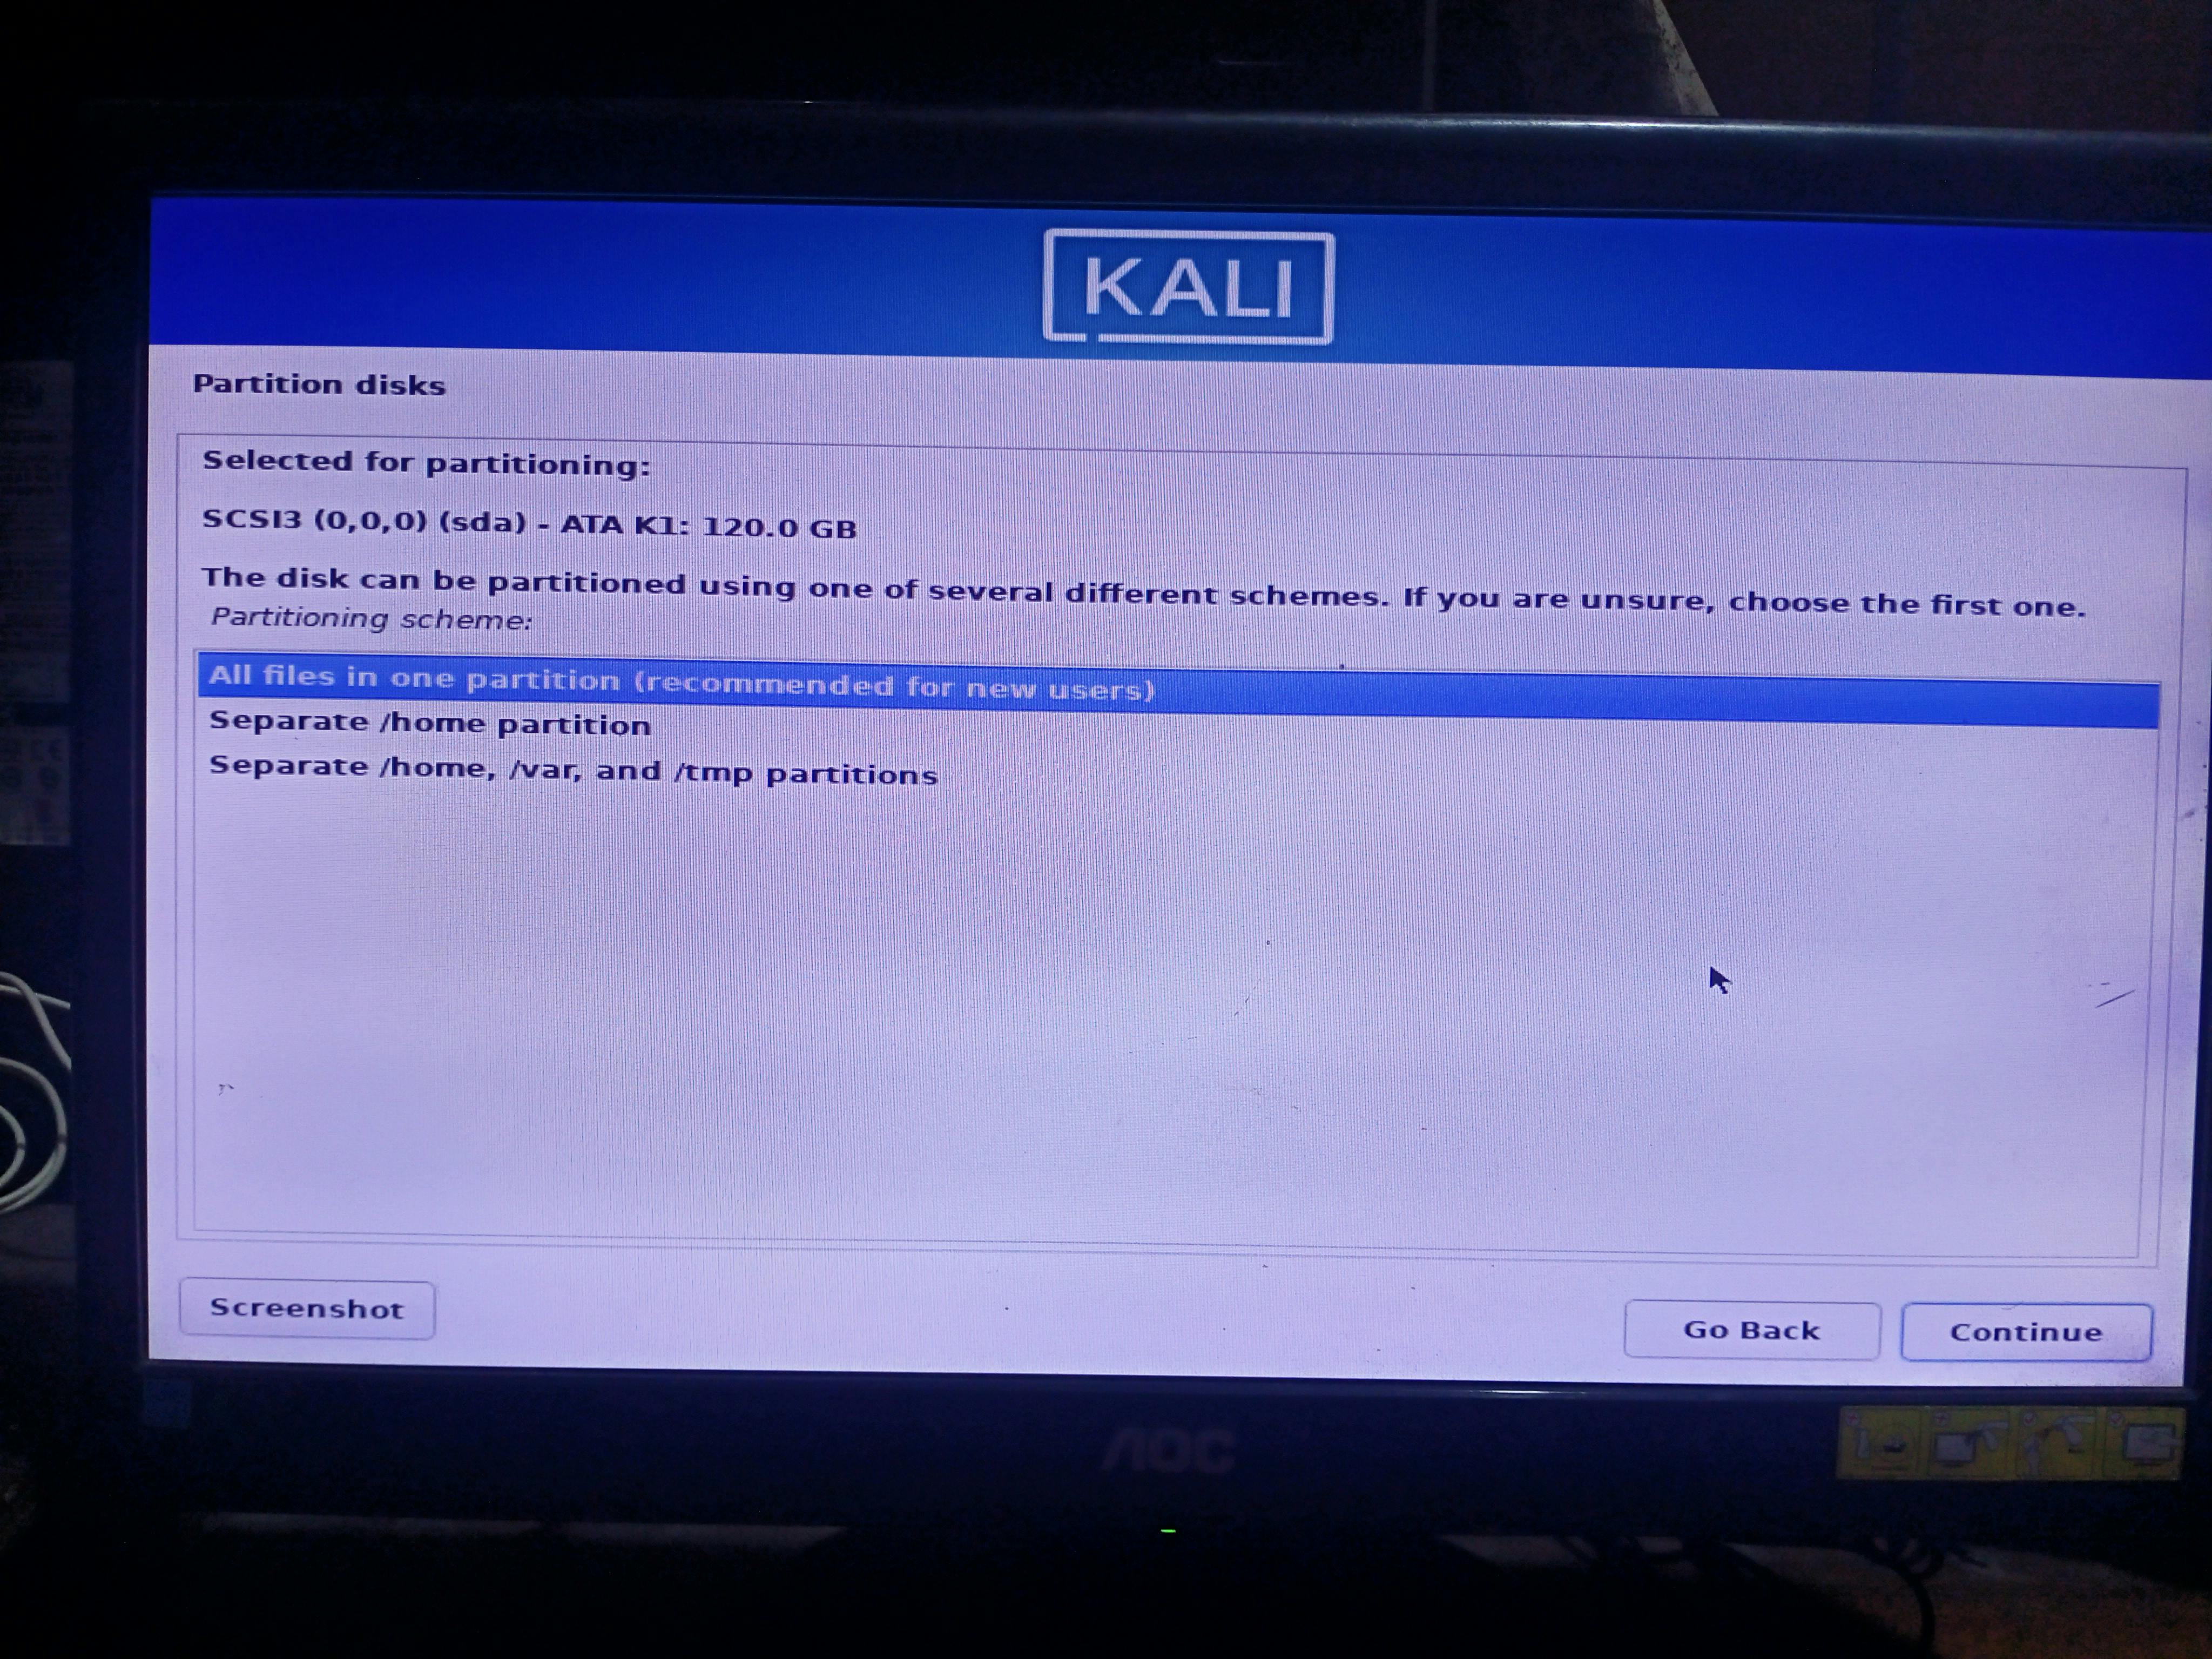
- For newbies select All files in one partition
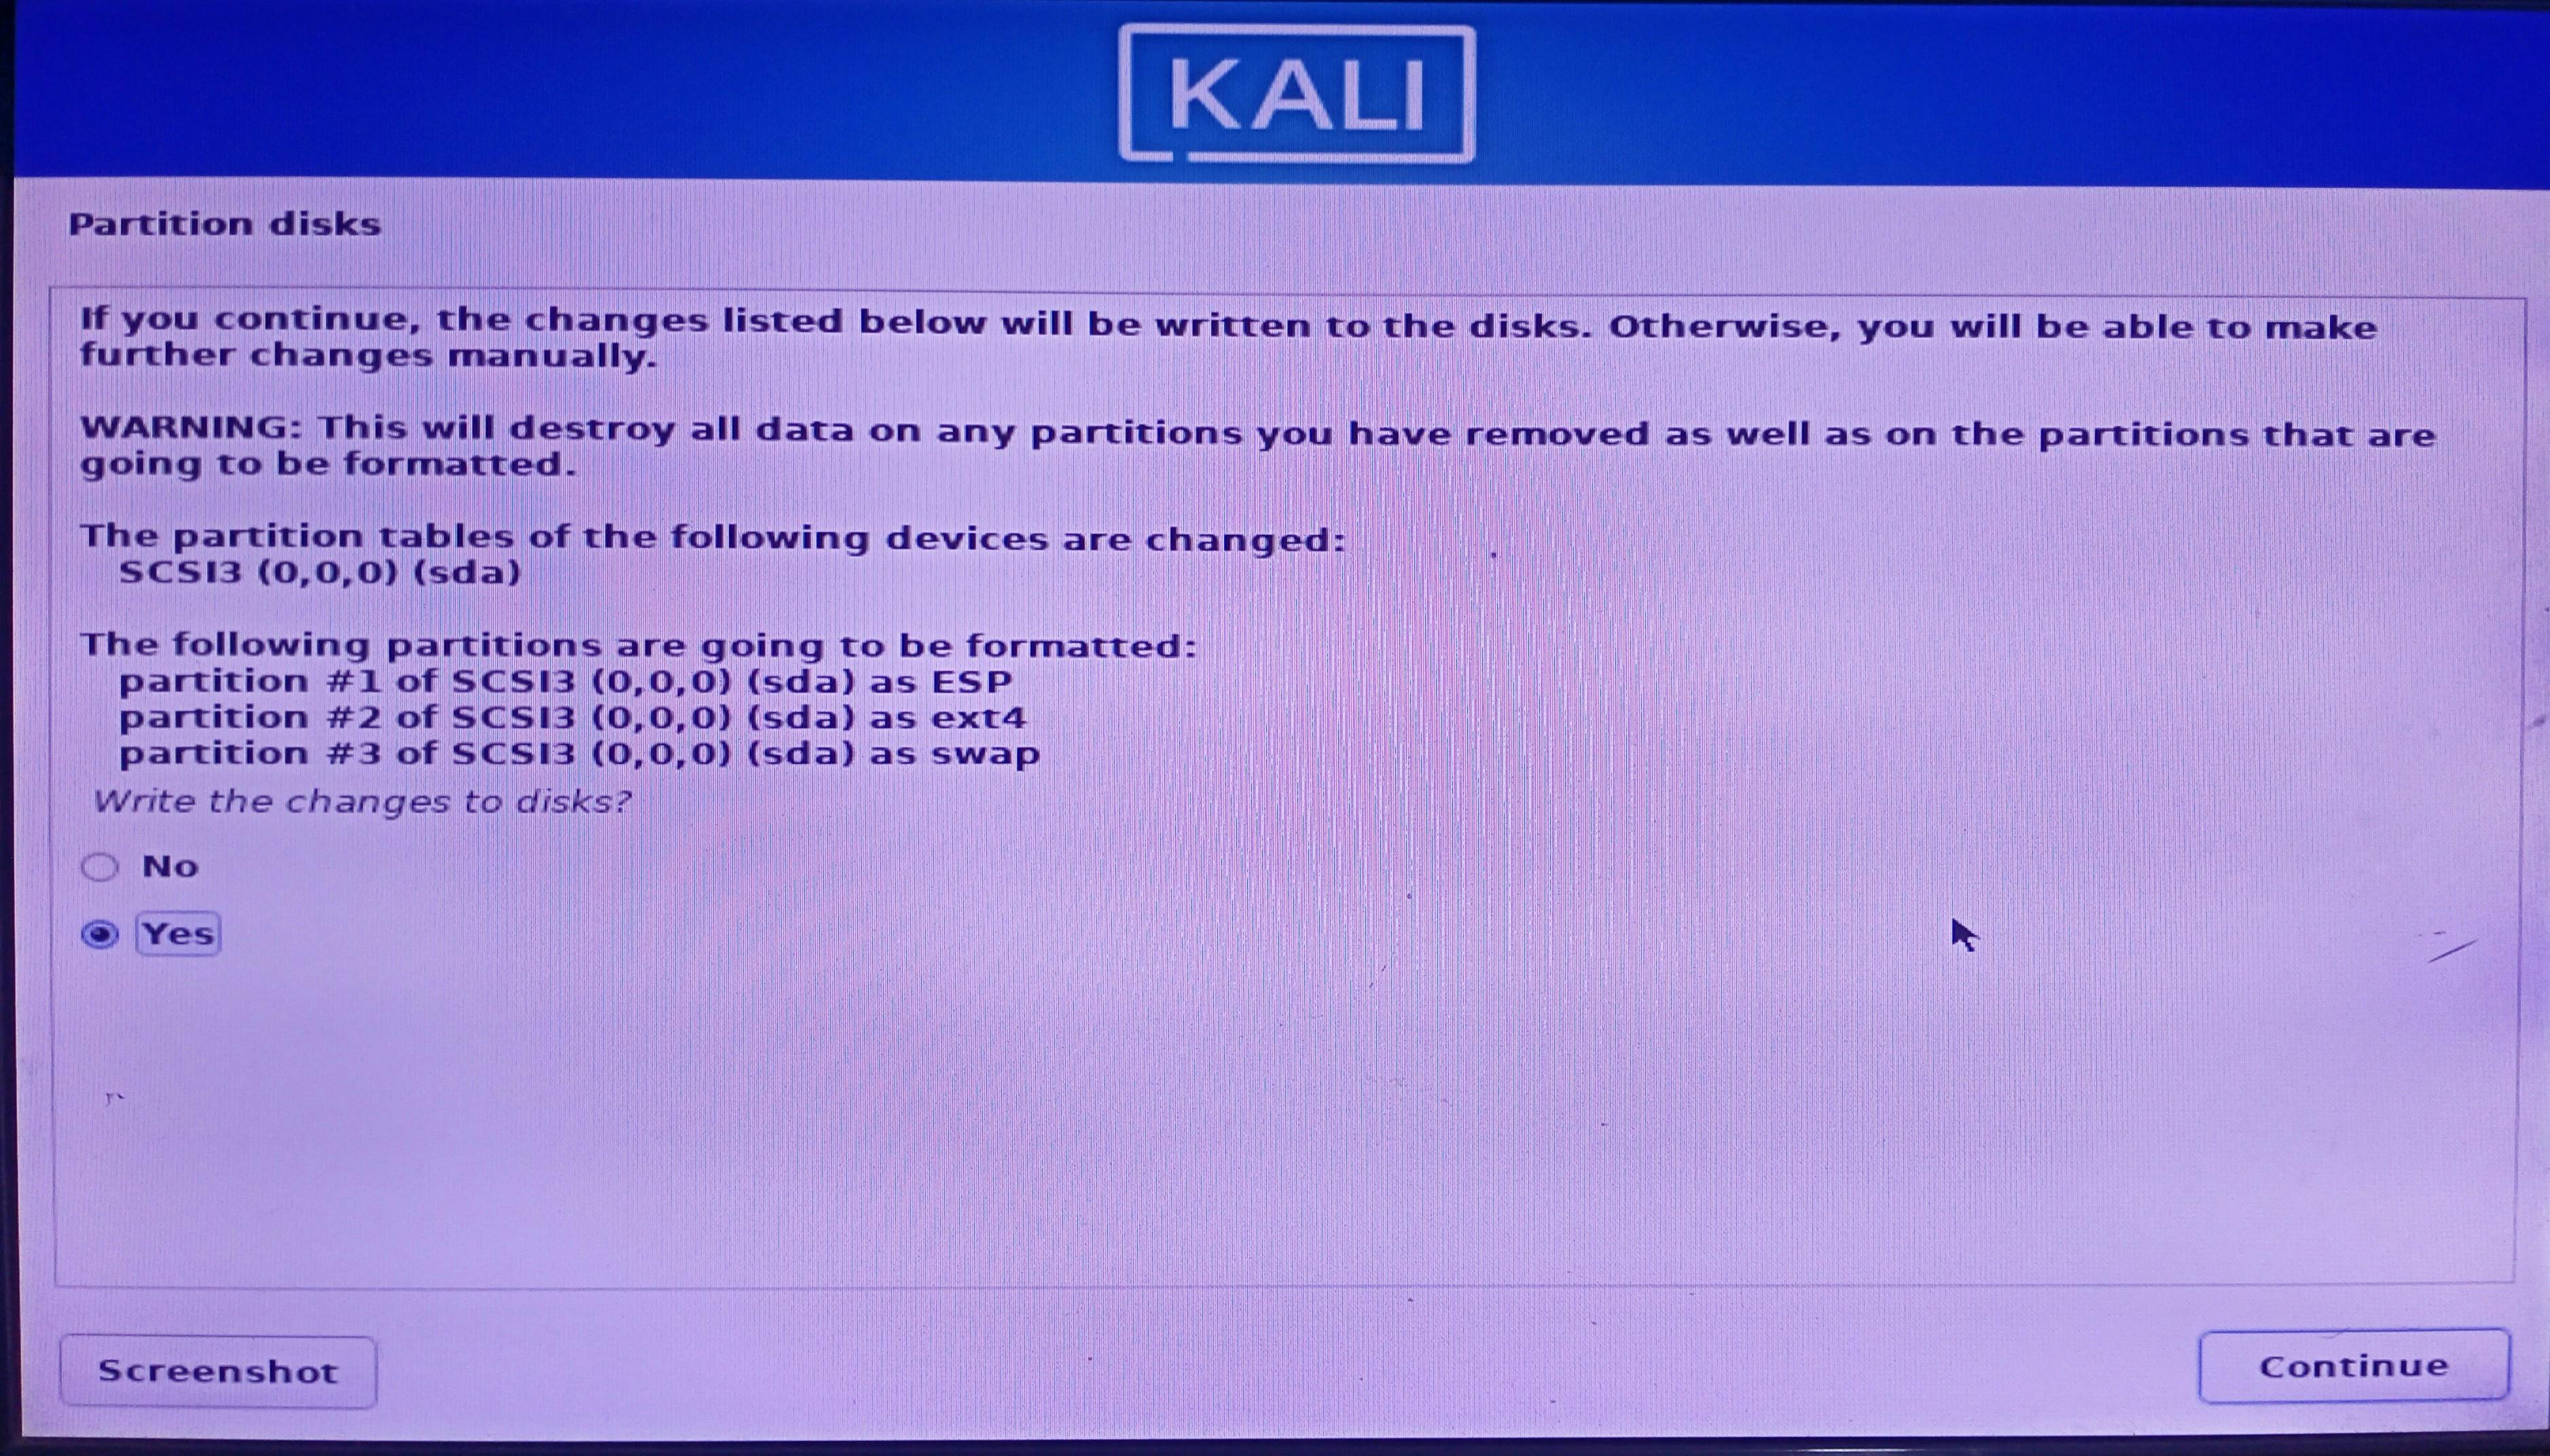
Select Finish partitioning and write changes to the disk
select yes.
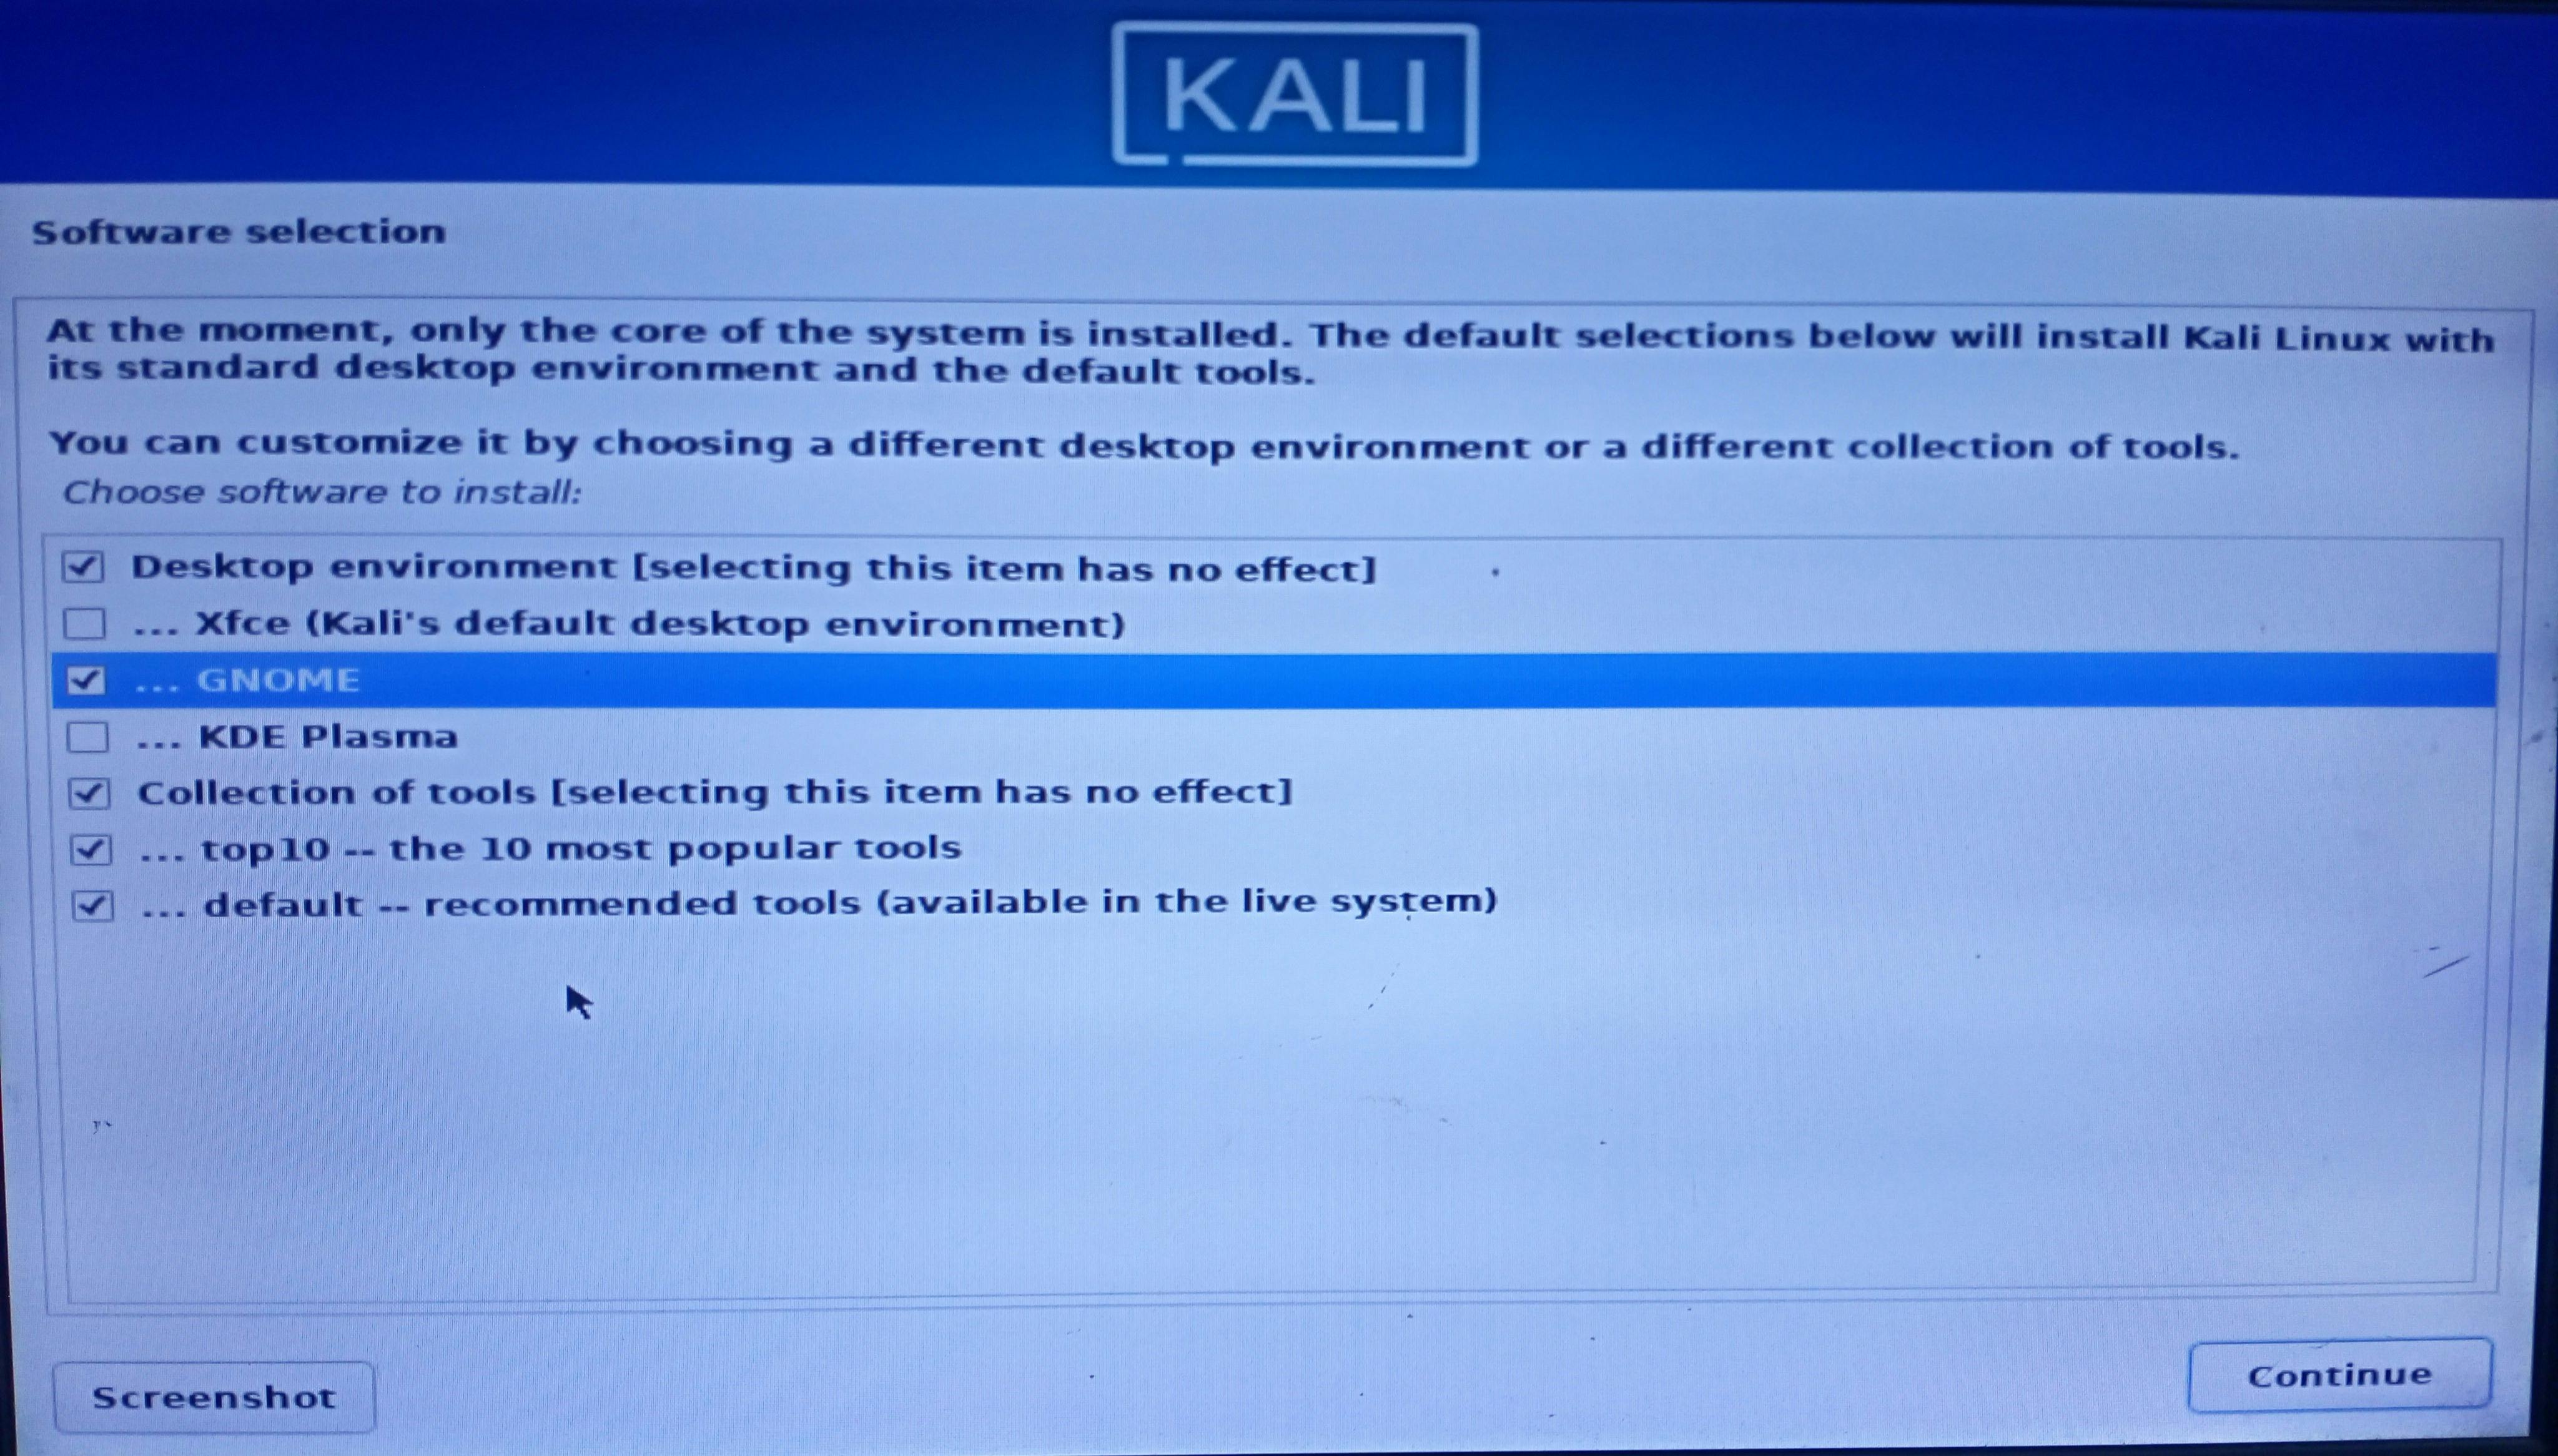
- Select a Desktop environment I will use Gnome.
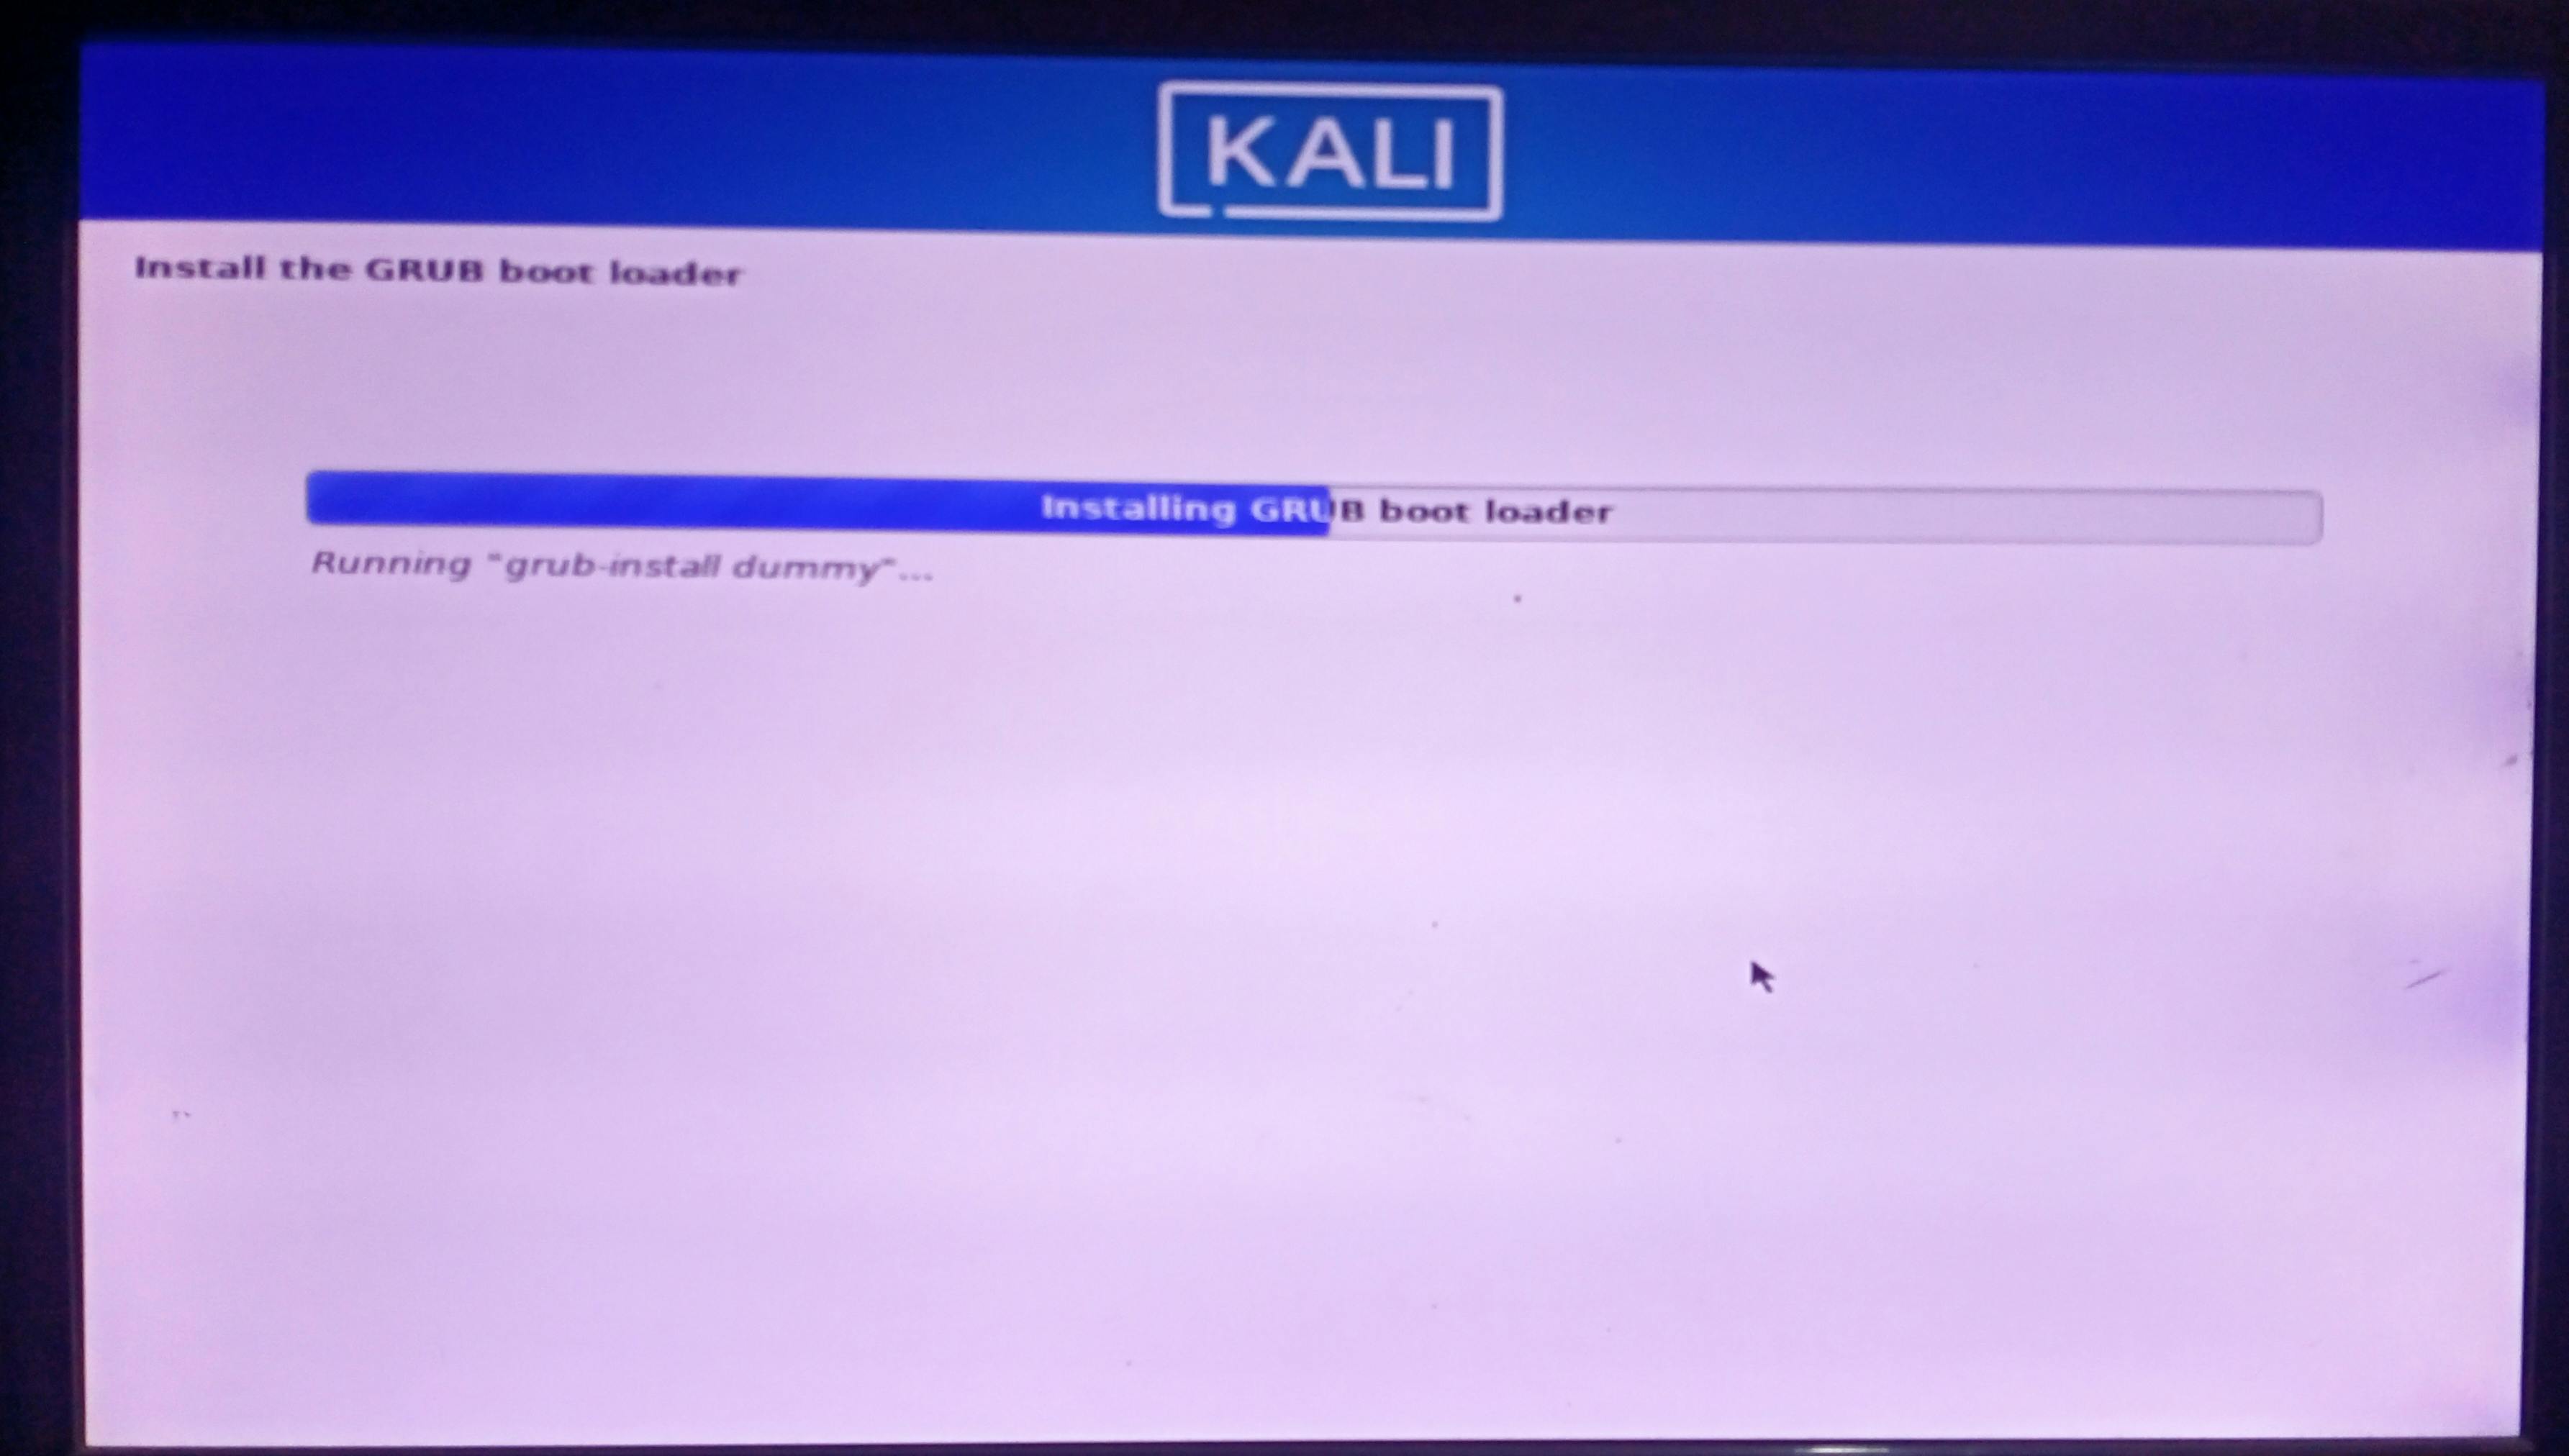
It will automatically install the GRUB Boot loader.
Note: If you see an option then click yes to install the GRUB Boot loader.
- Finish the Installation and click continue.

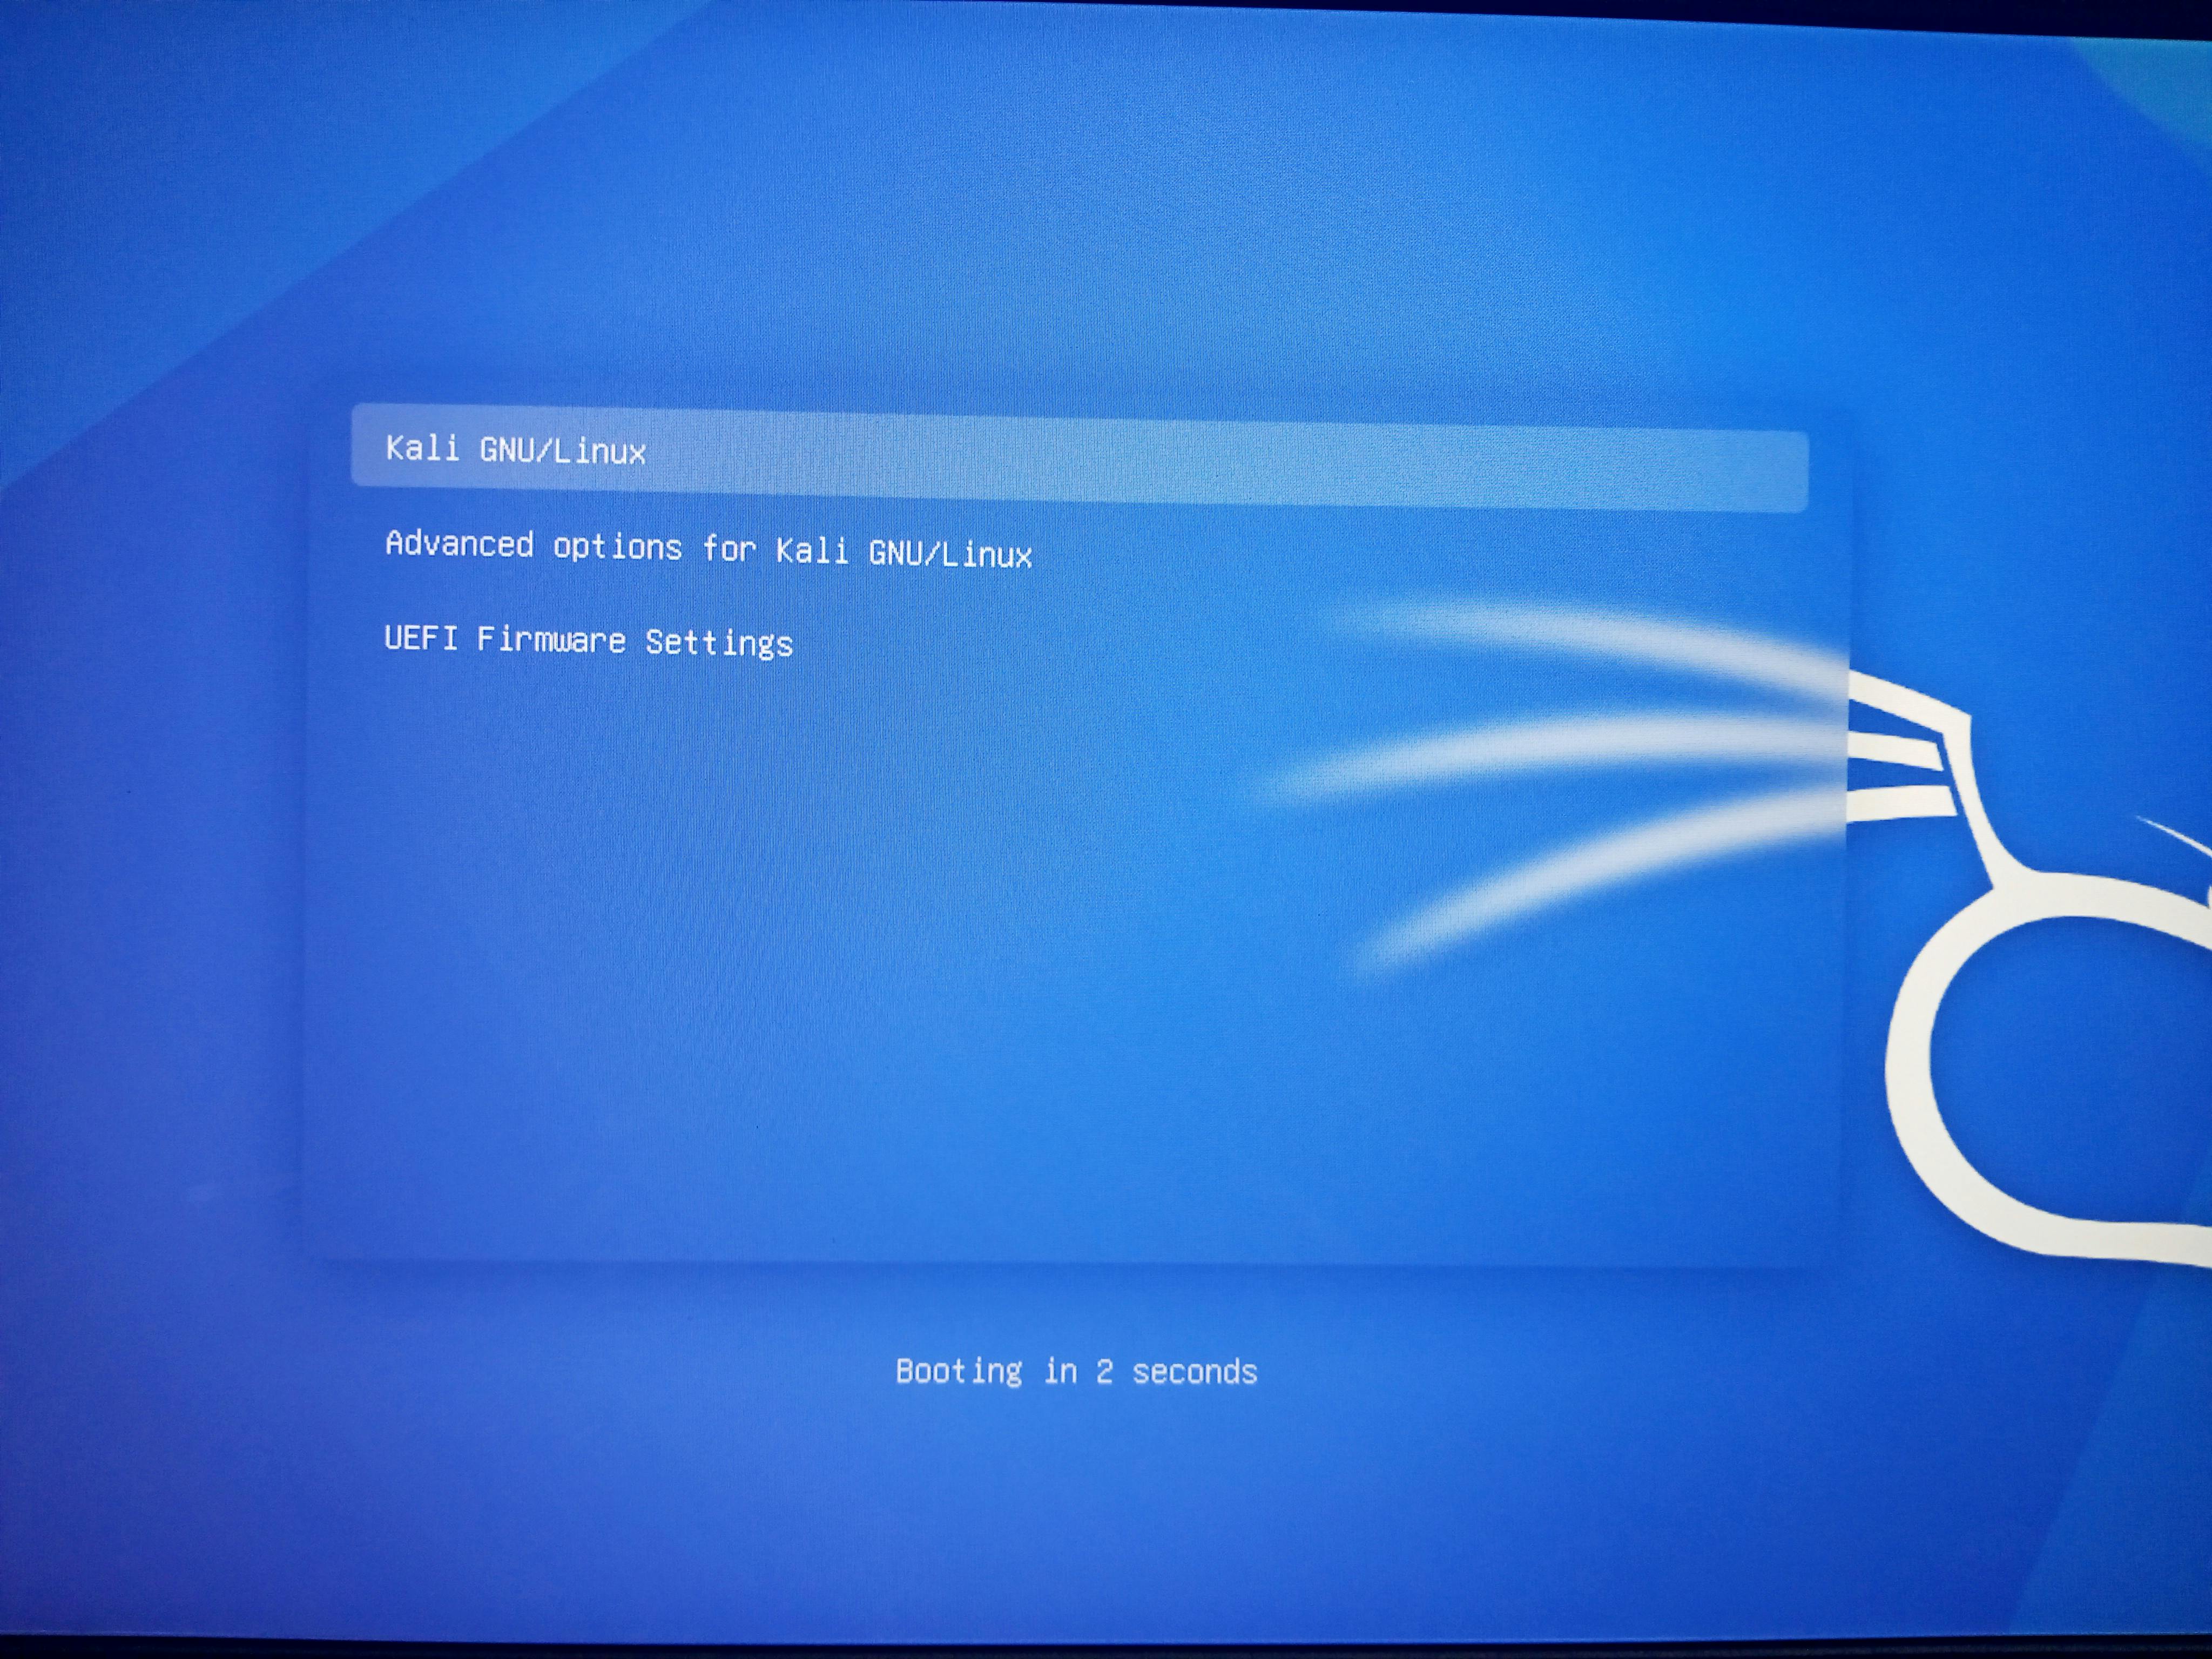
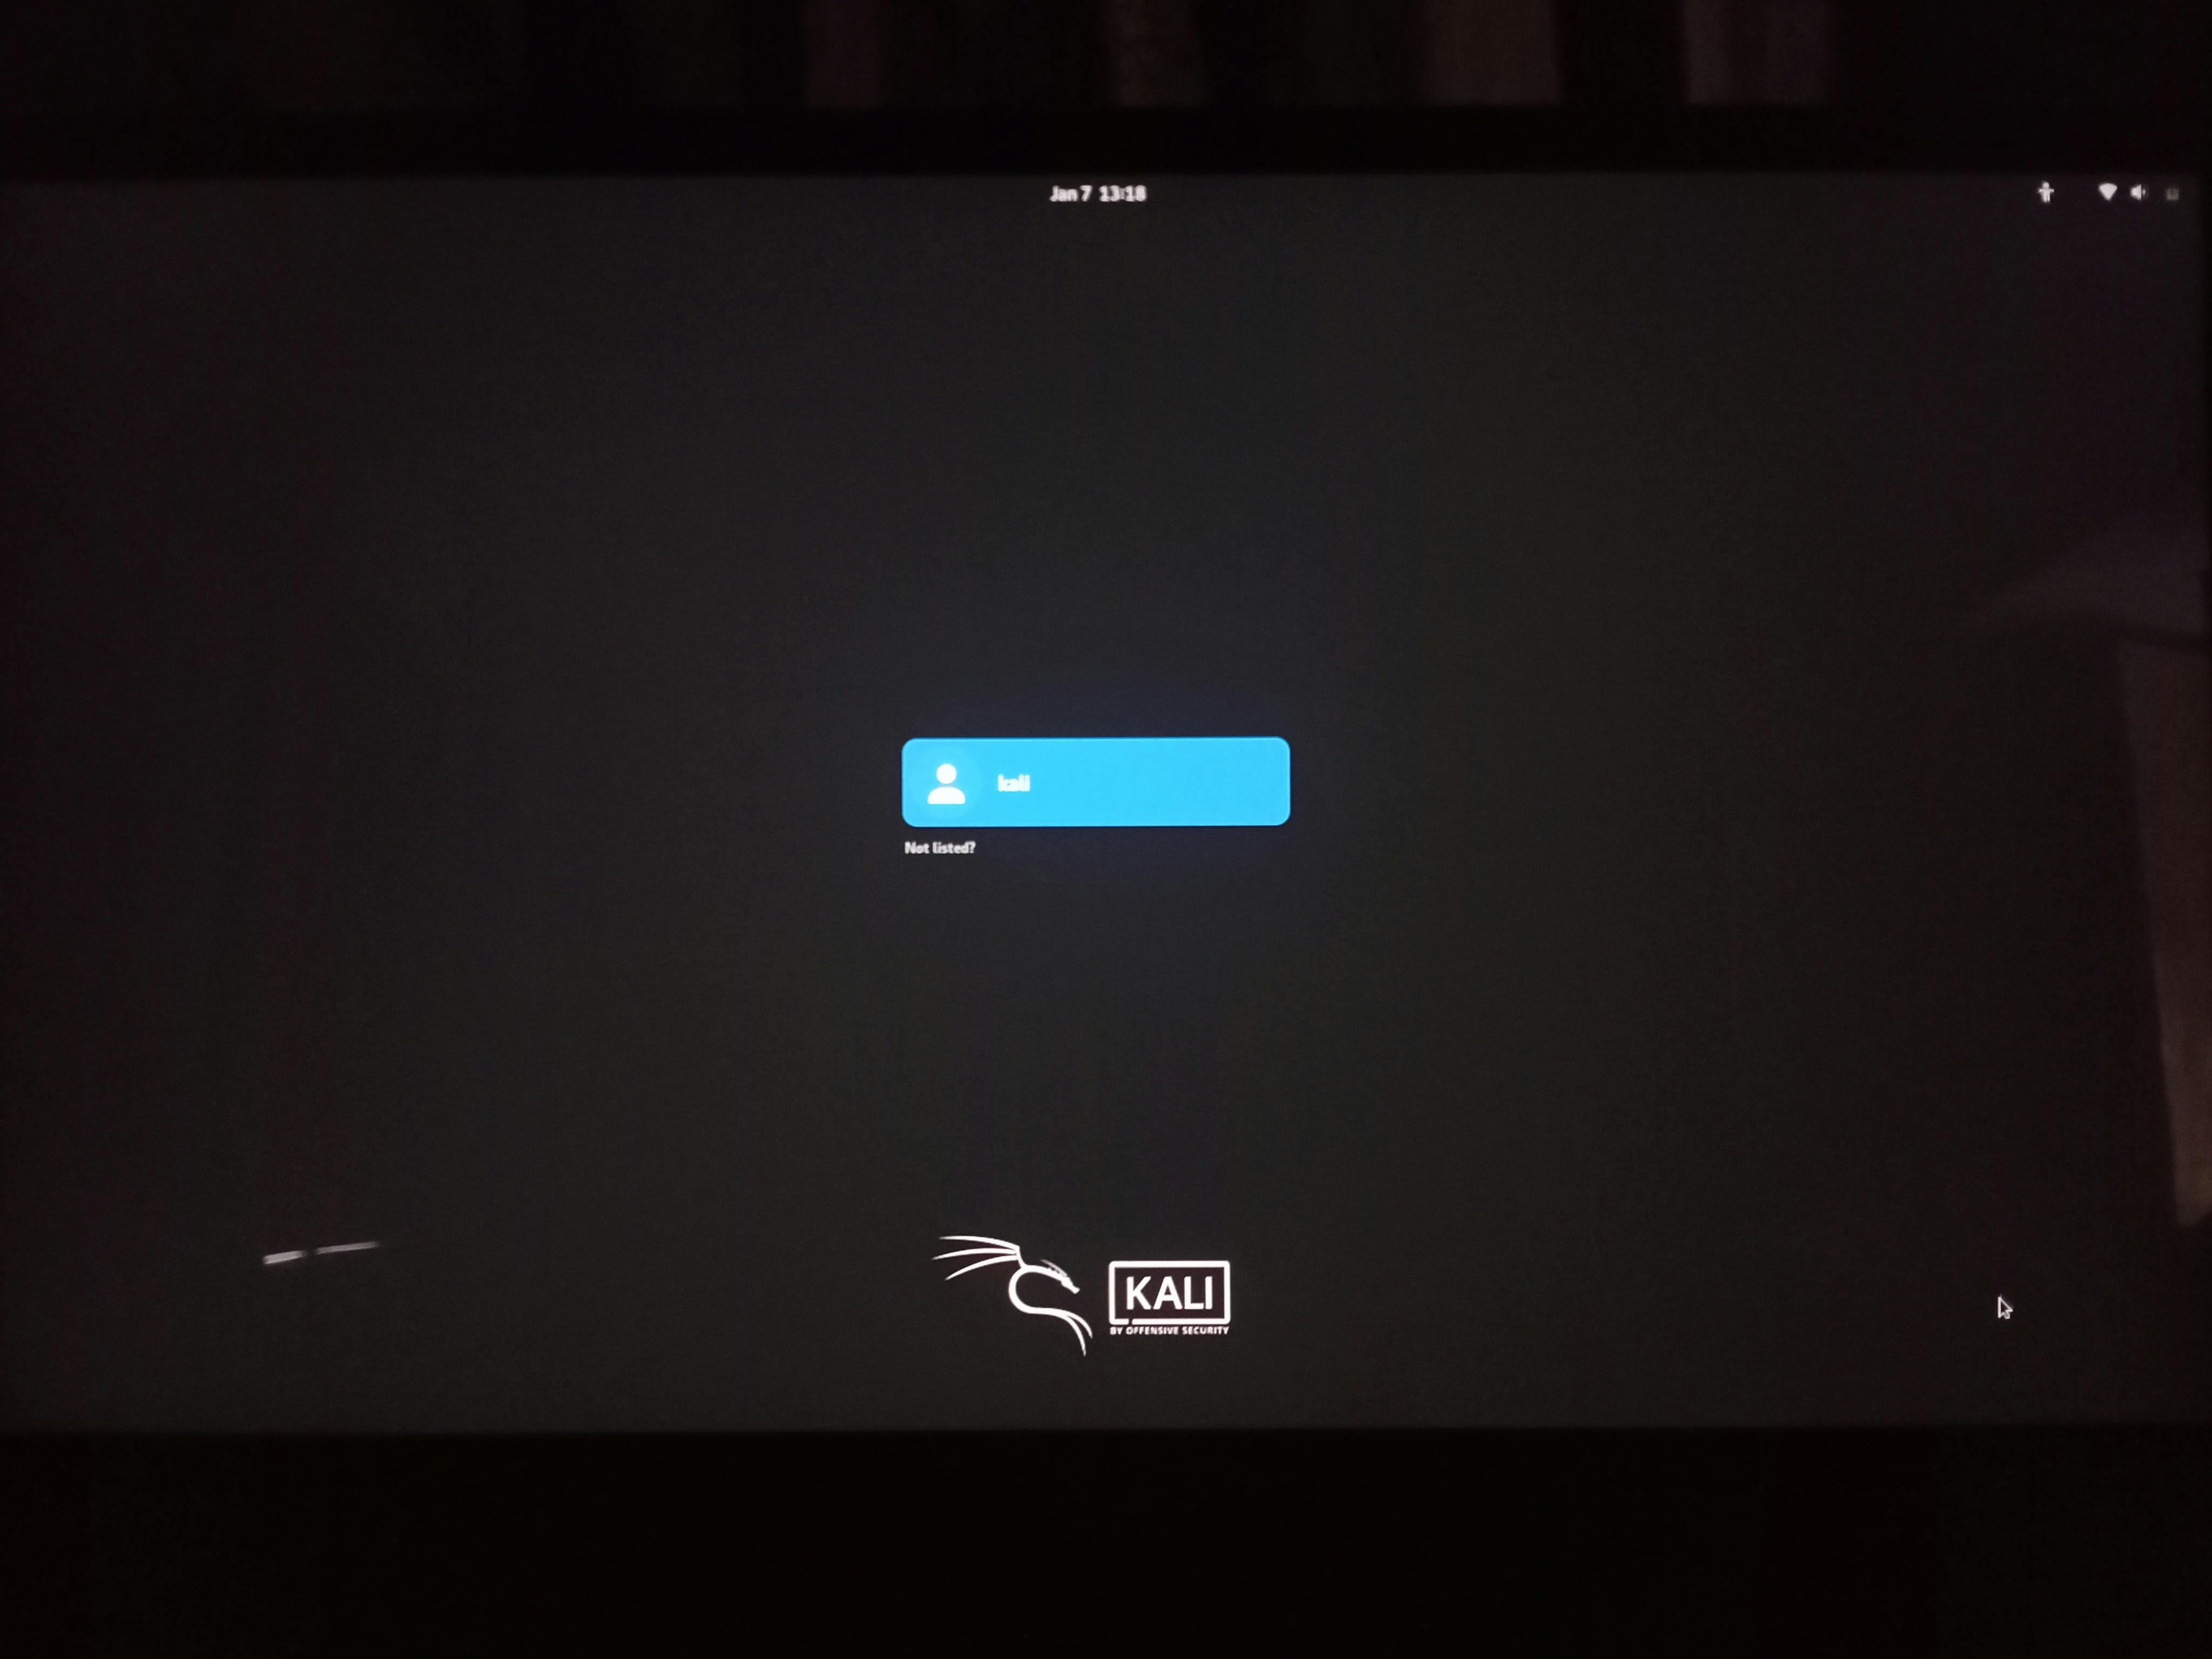
And last, select the Kali GNU option. Then enter the password that you selected before and enjoy kali Linux.
Suggests: Did you know how to get information about Linux systems in just 10 seconds?
If you have any problem you can message me on Twitter. I will try to solve your problem